REVIEW · LOMBOK
Mount Rinjan 2Days Summit Full Sunrise View Point 3726m
Book on Viator →Operated by Dhyns Rinjani Hiking · Bookable on Viator
Rinjani is a serious volcano day trip, and this 2-day express format helps you spend less time guessing and more time moving. What I like most is the small group size (max 15) and the way the team handles the heavy logistics like camp and cooking gear.
You’ll also notice the human touch. Guides such as Karan and Lee come up in recent trips, and the porter team gets praise for keeping morale up when the climb turns steep. That matters, because on Rinjani, your legs do the work, but your guide helps you survive the pacing and the terrain.
One consideration: this is built for experienced trekkers with strong fitness, so it is not the best pick if you want a slow, scenic stroll. If weather is rough, the plan can shift, since the trek needs good conditions.
In This Review
- Key Things to Know Before You Go
- Why This Express Mt. Rinjani Trek Feels Different (and Faster)
- The Start: Senaru to Sembalun, Where You Begin to Feel Altitude
- Day 1 Walking Plan to Sembalun Crater Rim (2639m): Meadows, Posts, and a Steep Finish
- Sunset and Sunrise: Why Camping Here Is the Point
- Day 2 and the 3726m Sunrise Viewpoint: The Reason You Came
- What’s Included: Guide Support, Porters, and the Meals That Keep You Going
- Gear and Comfort: What You Won’t Have to Rent or Carry
- Price Check: Is $175 Worth an Express Summit-Style Trek?
- The Real Risks Here: Fitness, Weather, and Pacing
- Who This Tour Suits Best (and Who Should Skip It)
- Should You Book This 2-Day Rinjani Summit Tour?
- FAQ
- What is the duration of this Mount Rinjani trek package?
- Where is the tour located?
- How much does the tour cost?
- How many people are in the group?
- What is included in the trek besides the guide?
- Is camping equipment or sleeping gear provided?
- Are pickup and transfers included?
- Is the Mount Rinjani admission fee included?
- What happens if the weather is bad?
Key Things to Know Before You Go
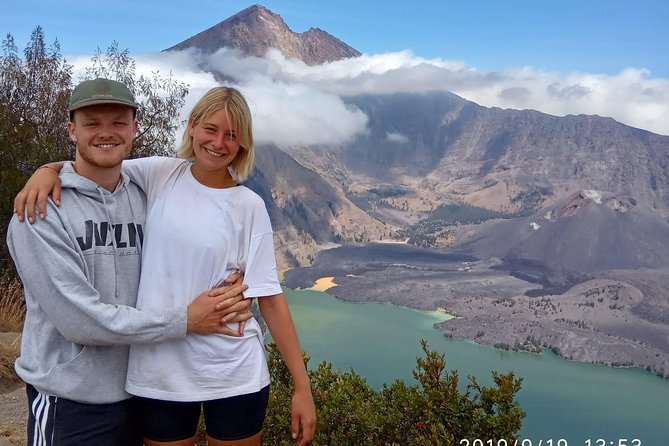
Small group pace meant for an express summit schedule
Camp at the Sembalun crater rim (2639m) with sunset and sunrise chances
Porters carry cooking and camping equipment so you can focus on walking
Gear is provided: tent, sleeping bag, mattress, pillow, even a toilet tent
Water is included (3 liters mineral water per person per day)
Admission fee to the park is not included (IDR 520,000 per person)
Why This Express Mt. Rinjani Trek Feels Different (and Faster)
Mount Rinjani is one of Indonesia’s big-name volcano treks, and big treks usually come with big unknowns: How hard is the climb really? How much time will you lose? What’s included, and what isn’t? This package is designed to reduce those uncertainties by building an express 2D/1N schedule and keeping the group size tight at 15 people.
The “express” part isn’t about rushing recklessly. It’s more about avoiding the slowest segments and sticking to a direct rhythm. That’s important because Rinjani’s challenge isn’t just the altitude. It’s the repeated effort: long walking days, steep stretches, and the cold of higher elevations when the sun finally sets. A smaller group also means less jostling, fewer bottlenecks on narrow trail sections, and easier communication when the guide needs to adjust pacing.
I also appreciate the clear value proposition: you aren’t asked to solve the mountain’s practical problems. Porters handle cooking gear and camping equipment. You get provided camping items like a tent and sleeping gear. And you carry what’s manageable for your own comfort, not a mountain-sized kit.
The Start: Senaru to Sembalun, Where You Begin to Feel Altitude
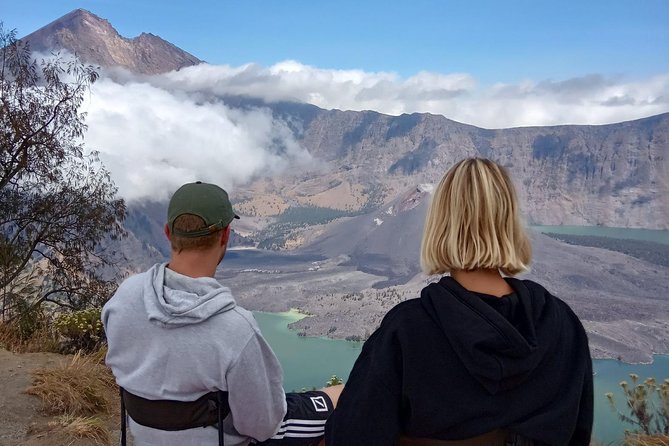
Day one starts in the Senaru area, with the meeting point at D’hyns Rinjani Hiking on Jalan senaru pawang karya, Senaru (North Lombok). The tour includes a wake-up and breakfast timing (you wake at 6:00), then you drive to Sembalun, where you register at the Rinjani information center.
You’ll begin around Sembalun village at 1100m, which is a useful base because it means you’re not starting from sea level. Still, the altitude increase hits gradually. Even before the steep parts, the air can feel different, and your breathing naturally changes. This is one reason the express format matters: you’ll get into your walking rhythm early, so you don’t waste energy on panic breaths and slow starts.
What you’re really doing in this opening segment is setting expectations for how your body should work. On volcano treks, the first few hours teach you your pace. If you go too hard at the beginning, you pay for it later on the final climb to the crater rim.
Day 1 Walking Plan to Sembalun Crater Rim (2639m): Meadows, Posts, and a Steep Finish
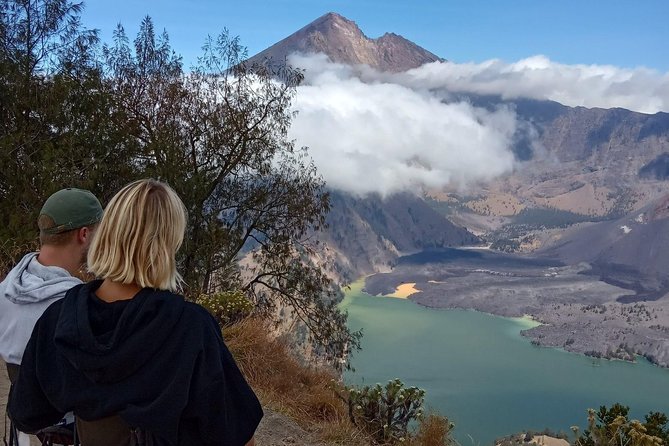
The day’s route is structured with clear milestones, and that clarity helps. After breakfast and registration, the trek begins around 8:00. You start with a gentle climb through open meadow. That early meadow walking is your warm-up in real terrain, not a flat treadmill. It also gives you room to spread out a bit, which helps if you’re trying to keep a steady pace.
After roughly 2 hours, you reach Pos 1 (1300m). From there, about 40 minutes brings you to Pos 2 (1500m). These posts aren’t just markers on a map; they’re breathing points where you can check how your body is responding. If you feel overly taxed by the time you hit Pos 1 or Pos 2, it’s your cue to slow down, sip water, and settle into a calmer rhythm.
Next comes Pos 3 (1800m), reached after continuing upward and then taking your lunch here. Lunch at 1800m matters because it resets you before the “real climbing” portion. It also gives you time to rest without losing momentum completely. On active volcano hikes, the worst moments are often the long pause where your body starts cooling down—so a planned rest is better than random stops.
Then the day shifts into the steep climb toward the Sembalun crater rim at 2639m. Expect this part to take around 3 hours, including a prolonged steep section. This is where strong fitness pays off. It’s not only about leg strength. It’s about finding a steady cadence when your stride gets short and your footing gets more demanding.
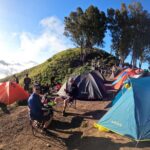
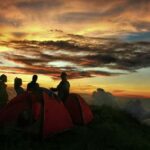
Once you reach the rim, you camp overnight at that elevation. This is a big deal for comfort and experience. Higher up, the view is dramatic, the air can feel sharp at night, and the crater rim turns the whole trek into a real mountain moment rather than just a hike.
Sunset and Sunrise: Why Camping Here Is the Point
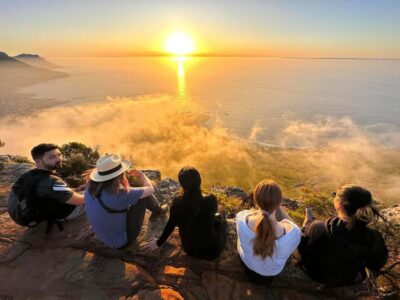
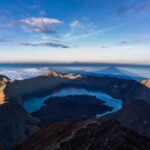
At the crater rim, you’re positioned for sky-changing views. The plan specifically notes you can enjoy sunrise and sunset from the rim. Even if clouds show up, the rim elevation gives you better odds for that clear horizon line that makes volcano treks worth the effort.
The practical benefit is that you don’t have to wake up before dawn and sprint upward without time to settle. You already earned your altitude, and the next day becomes a more controlled climb toward the sunrise viewpoint.
Day 2 and the 3726m Sunrise Viewpoint: The Reason You Came
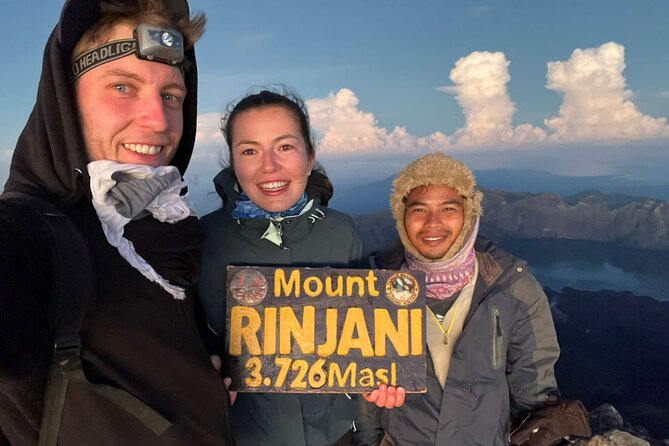
Your title promise here is full sunrise at the viewpoint around 3726m, and that’s the core payoff of the tour. While the detailed step-by-step for day two isn’t spelled out in the info you provided, the structure is clear: you do a night at the rim, then make the summit-side push to reach the sunrise viewpoint, then you descend back to finish at the same meeting point.
This matters because a lot of volcano treks “sell sunrise” but don’t control the logistics well. Here, the approach is designed around timing—camp first, then move for sunrise. That reduces the chaos factor and helps you focus on walking efficiently in low light.
Physically, expect day two to feel like the culmination of day one plus colder air. Even if you feel fine at camp, your body can stiffen in the night and early morning. That’s why you’ll want to treat day two like a pacing exercise: move steadily, don’t sprint in the dark, and keep drinking water even when you don’t feel thirsty.
When sunrise finally shows, it tends to be the kind of moment that makes you forget the grumpy parts. But the best thing you can do is prepare for the “in between” period—waiting for light while the cold hangs around. Bring layers that are easy to manage while walking, and be ready for the trail to demand careful footing.
What’s Included: Guide Support, Porters, and the Meals That Keep You Going
You’re not on your own here. The tour includes an English-speaking guide and professional porters. Porters carry cooking gear and camping equipment, which is huge for an express trek. On a hike like Rinjani, the difference between carrying your own bulk and having porters handle the camp setup is the difference between finishing with energy and finishing with regret.
The food support is also part of the value equation. The info says you’ll get food and drinking water on the trek, plus 3 litre mineral water per day per person. In plain terms: you’re less likely to run low mid-route, and your pack weight stays reasonable.
From the feedback that comes through, people tend to remember the meals and the teamwork. Some trips were specifically guided by Karan or Lee, and the porter crew is praised for staying upbeat even when the climb gets tough. You’ll still do the hard work, but having staff who handle the cooking and keep things moving helps a lot with morale.
Also note: group discounts are mentioned, and the tour uses a mobile ticket, which can simplify check-in. Not glamorous, but it’s real-world convenience.
Gear and Comfort: What You Won’t Have to Rent or Carry
One of the smartest parts of this package is what it removes from your to-do list. You don’t have to rent camping equipment or manage the full base-camp setup.
Included items cover:
- Tent
- Toilet tent and paper
- Sleeping bags
- Mattress and pillow
- A chair
That’s a lot of comfort packing into one bundle. At high elevation, a poor sleep can ruin your next day. Having a sleeping bag plus a mattress and pillow isn’t “luxury” on a mountain like this—it’s the difference between waking up stiff and waking up ready.
There’s also luggage storage available at the D’hyns Rinjani Hiking office. That helps if you’re traveling with extra bags and don’t want them bouncing around with you during the trek.
Your carry load is still personal. Extra porter for your own luggage isn’t included, so if you’re carrying more than you should, plan to bring less or budget for help.
Finally: the trek includes water, but you still should treat hydration like a job. You’ll be working hard for long stretches, and altitude plus exertion can make you feel oddly dry even when you’re sweating less.
Price Check: Is $175 Worth an Express Summit-Style Trek?
At $175 per person, this is positioned as a value-focused express package. The price feels more reasonable when you compare what it covers: guide plus porters, trekking food and water, and camp gear including sleeping bags, mattress, and a tent. On volcano treks, those logistics are where costs often hide.
A big part of the value is that you’re paying for organization:
- Tight group size (15 max)
- Porters who carry camp and cooking equipment
- Camp setup items included
- 3 liters mineral water per person per day
- Luggage storage at the office
The parts not included matter for budgeting. Pickup and transfer/drop-off isn’t included, and hotel/accommodation isn’t included. Also, the Mount Rinjani admission fee is listed separately at IDR 520,000 per person.
So the real question is: are you already set for transportation and local timing? If you can handle getting to the meeting point, you’ll likely feel like the trek price is fair for what you get. If you still need a big chunk of ground logistics, your total cost can creep up.
Also, since the tour is non-refundable and not changeable for any reason, you’ll want to commit only if you’re confident you can travel on your planned date. Weather is another factor, since the experience requires good conditions and can be offered a different date or a full refund if canceled for poor weather.
The Real Risks Here: Fitness, Weather, and Pacing
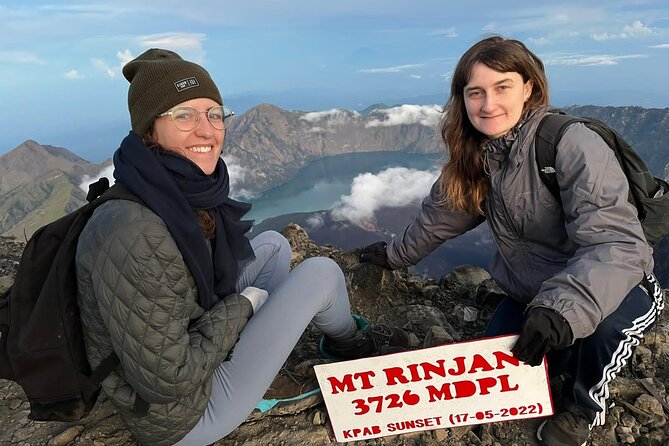
This trek is designed especially for experienced mountain climbers. The info explicitly says participants must be in good physical shape and have several mountain climbs experience. That’s not marketing language—it’s the difference between enjoying the summit approach and struggling through it with a miserable finish.
Weather is the other reality. The tour requires good weather, and poor weather can trigger a date change or refund. That’s why it helps to build flexibility into your Lombok schedule if you can.
Finally, pacing is your biggest daily control. An express itinerary compresses time and increases early effort. If you’re not used to steep ascents, you may feel okay at lunch and then hit a wall on the steep climb to the rim. Use the posts and scheduled breaks as your cues to keep the effort steady, not heroic.
Who This Tour Suits Best (and Who Should Skip It)
This is best for you if:
- You want an express 2D/1N trek with a clear plan and limited group size
- You have strong fitness and real trekking experience
- You want staff to handle camp and cooking so you can focus on walking
- You care about the sunrise viewpoint and want the timing organized around reaching it
You might want to skip it if:
- You’re new to mountain trekking or unsure you can handle steep, high-elevation walking
- You want a slow, flexible sightseeing pace
- You need extensive support with logistics beyond what’s included
Should You Book This 2-Day Rinjani Summit Tour?
If you’re fit, experienced, and ready for an organized push toward sunrise at the 3726m viewpoint, I think this tour is a strong choice. The main draw is practical: small-group care, porters for camp and cooking, and included gear that makes the overnight rim stay realistic instead of uncomfortable.
Before booking, double-check two things. First, make sure you’re comfortable with the fitness expectations and the steep day-one climb to 2639m. Second, plan around transportation since pickup and accommodation aren’t included.
If those boxes match your style, this express format gives you a direct path to one of Lombok’s most intense and memorable mountain experiences.
FAQ
What is the duration of this Mount Rinjani trek package?
It’s a 2-day trek, listed as approximately 2 days (2D/1N).
Where is the tour located?
The tour is in Lombok, Indonesia.
How much does the tour cost?
The price is $175.00 per person.
How many people are in the group?
The maximum group size is 15 travelers.
What is included in the trek besides the guide?
Included items are trekking guide and porters (who carry cooking gear and camping equipment), an English-speaking guide, food and drinking water (3 litre mineral water per day/person), and camping gear such as a tent, toilet tent and paper, sleeping bags, mattress, pillow, and chair. There is also luggage storage at the hiking office.
Is camping equipment or sleeping gear provided?
Yes. The package includes a tent, sleeping bags, mattress, pillow, and chair, plus a toilet tent and paper.
Are pickup and transfers included?
No. Pickup and transfer/drop-off are not included.
Is the Mount Rinjani admission fee included?
No. The admission fee is listed separately at IDR 520.00 per person.
What happens if the weather is bad?
This experience requires good weather. If it’s canceled due to poor weather, you’ll be offered a different date or a full refund.