REVIEW · SEATTLE
Mt. Rainier highlights – old forest, falls and glaciers
Book on Viator →Bookable on Viator
Glaciers, waterfalls, and real old trees. This Seattle-to-Mt. Rainier highlight day trip adds Reflection Lake mirror views and a glacier picnic near Paradise, with hiking in summer and snowshoeing in cooler months. You also get a small-group pace that keeps the day from feeling like a cattle call.
I like how the itinerary mixes big-ticket sights with short walks you can actually enjoy. The stop plan also lines up with what you want to photograph most: Narada Falls, Christine Falls, and the old-growth stretches around Paradise and Longmire.
One consideration: the Paradise hike section has a steep uphill feel, and the tour is not recommended if you have knee or hip problems. Add in Seattle-to-Rainier driving time, and it’s a long day—even though the pace is relaxed once you’re in the park.
In This Review
- Mt. Rainier in One Day, With Real Time Outside
- The Big Pitch: What Makes This Mt. Rainier Day Trip Worth It
- Paradise Visitor Center: The Glacier Picnic That Sets the Tone
- Summer vs Winter: Hiking in July, Snowshoeing From November to June
- Narada Falls and Christine Falls: Two Waterfalls With Different Personalities
- Narada Falls
- Christine Falls
- Reflection Lake: The Mirror Moment (When Conditions Cooperate)
- Longmire: Old-Growth Forest at Lower Elevation
- Stops That Feel Like Photo Ops, Without Feeling Like a Script
- Gear and Comfort: Trekking Poles, Water, and Traction
- Getting There From Seattle: Drive Time and Pickup Options
- Who This Tour Is Best For (And Who Should Rethink)
- Price and Value at $179: What You Get for the Money
- Should You Book This Mt. Rainier Highlights Tour?
- FAQ
- How long is the Mt. Rainier day tour?
- Where do I meet the tour in Seattle?
- Is lunch included?
- Do I need hiking experience in winter or spring?
- What gear is included?
- How much walking/hiking is involved?
- Is this tour okay if I have knee or hip problems?
Mt. Rainier in One Day, With Real Time Outside
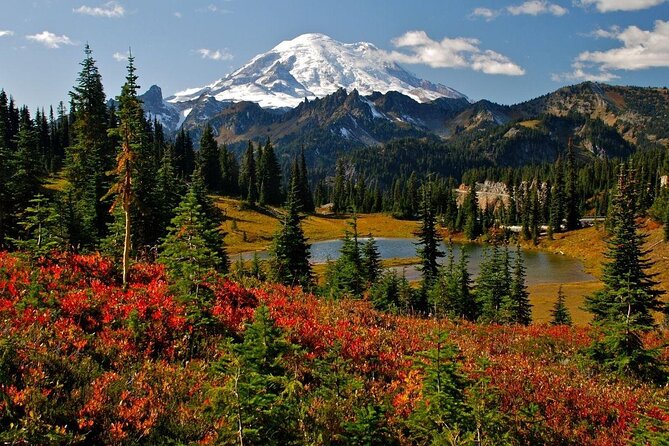
- Reflection Lake photo time where the mountain can show up as a reflection in summer
- Glacier-side picnic near Paradise after a short but noticeable uphill walk
- Narada Falls and Christine Falls with specific, timed stops for views
- Old-growth forest walks near Longmire, at lower elevation
- Winter option from November to June: snowshoes and crampons included, no experience required
- Maximum 14 travelers keeps the tour feeling calm and guide-led, not rushed
The Big Pitch: What Makes This Mt. Rainier Day Trip Worth It
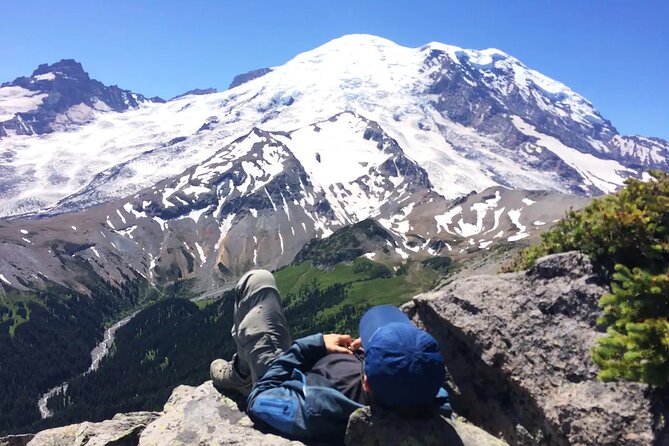
If you’ve only got a day (or you just don’t want to plan a whole car-and-parking operation), this tour is built around the core Mt. Rainier payoff: Paradise views, waterfalls, and old forest. You’re not floating through a park in a bus bubble. You’re getting out to walk, stop, and take pictures in several different environments.
I also like the way the day balances “wow” with practicality. The itinerary includes an out-and-back hike to a glacier area, plus short walk-and-look stops like Narada Falls and Christine Falls. That means you can enjoy the mountain without needing to commit to an all-day, summit-level grind.
The price—$179 per person—makes sense when you look at what’s included. You get transport from Seattle, bottled water, and core gear (trekking poles in general, plus snowshoes and crampons in the November–June season). For many people, those items alone would cost time and money if you tried to assemble them yourself.
You can also read our reviews of more tours and experiences in Seattle.
Paradise Visitor Center: The Glacier Picnic That Sets the Tone
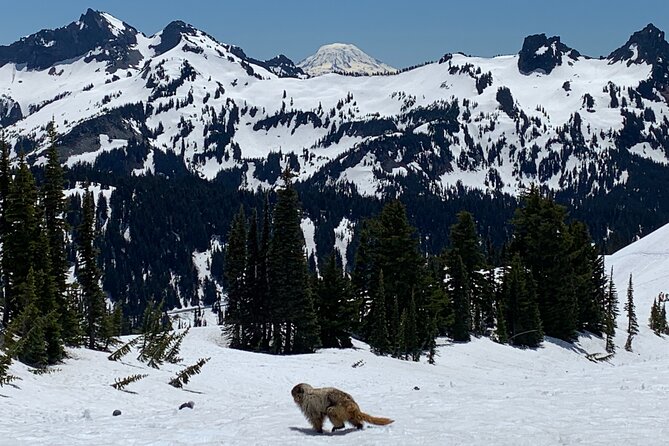
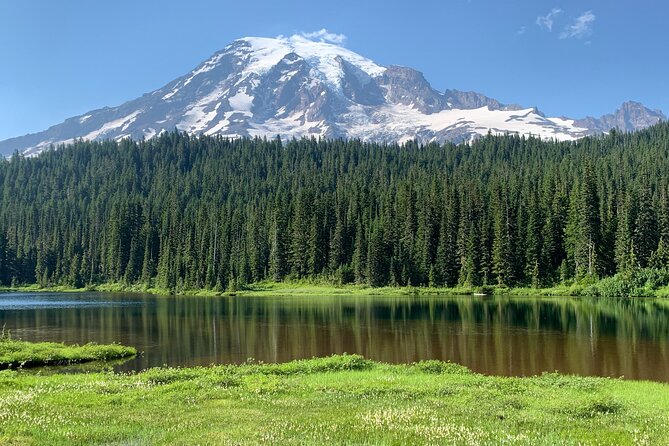
Most Mt. Rainier day trips either skip the glacier connection or make it feel distant. Here, Paradise is the anchor. You drive in from Seattle (about two hours) and start at the visitor area at Paradise, sitting at around 5,500 feet.
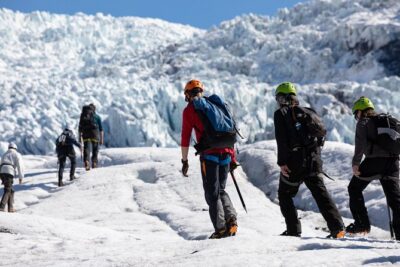
From there, you hike about one mile to a picnic spot near giant glaciers. It’s short on paper, but the reviews you’ll see (and what the route suggests) point to a steep start uphill. The good news: you’re going for an up-close view payoff, not for distance records. Bring a steady pace mindset and you’ll be fine.
Then you hike back the same way—about another mile—so your body gets a full “out and back” experience without turning the day into a long endurance trek. If you’re traveling with people who want options, this is where the guide’s flexibility matters most: you’ll likely get guidance on pacing and when to rest for photos.
At this point in the day, you get a key lesson about Mt. Rainier: the mountain changes your expectations fast. Even when conditions look mild at lower elevation, Paradise sits high, and the weather can act differently. That’s one reason tours like this feel safer than DIY for first-timers.
Summer vs Winter: Hiking in July, Snowshoeing From November to June
This tour runs year-round, but the “walk” changes with the season. In Winter and Spring (November–June), you’ll snowshoe instead of hiking—and you don’t need prior experience. Snowshoes and crampons are included, so you’re not stuck improvising gear when the ground is icy.
In summer, it’s a hiking-focused day. The tour still keeps the distances reasonable: short hikes, plus lookout-and-photo time. So you get the same major sights, but the mode of travel shifts based on conditions.
Here’s the practical bit: if you’re visiting outside peak summer, treat this as a season-appropriate adventure, not a casual stroll. Even with gear provided, you should dress for cold, wind, and wet. Mt. Rainier can do that “clear and crisp” thing and still feel sharp up high.
Narada Falls and Christine Falls: Two Waterfalls With Different Personalities
After the Paradise glacier hike and picnic, the tour shifts into waterfall country—still around the Paradise area. This is where you’ll appreciate the stop timing, because waterfalls are at their best when you’re not sprinting to reach them.
Narada Falls
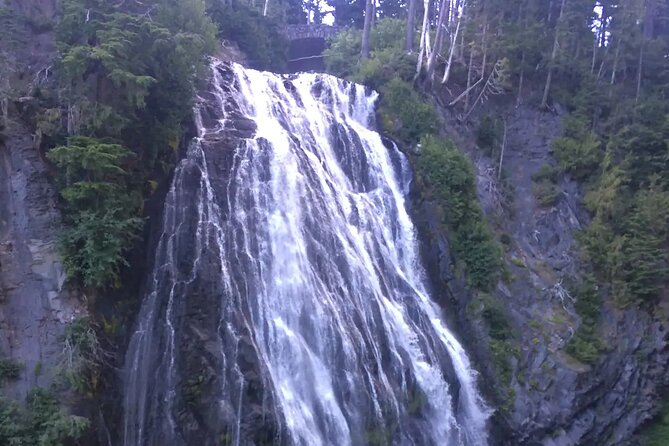
You’ll make time for Narada Falls, including a hike to the bottom. It’s about a 168-foot drop, and the stop is timed for around 20 minutes. This is the kind of walk that’s short enough to keep moving but long enough for you to feel the scale of the falls.
If the trail conditions are wet or icy (especially in shoulder seasons), you’ll be glad the tour is organized around the right gear for the season. In winter/spring, snowshoes and traction help keep you upright on uneven ground.
Christine Falls
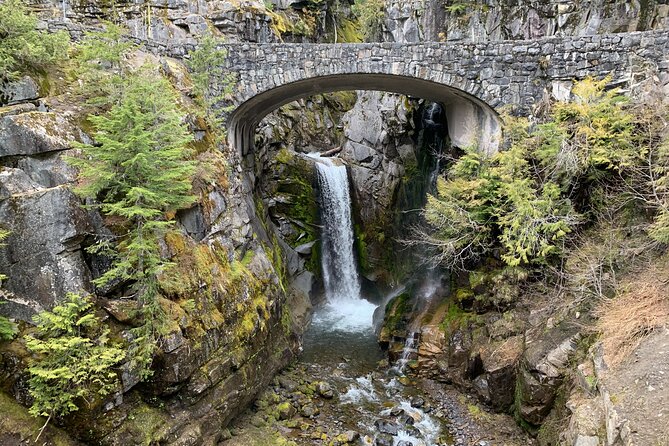
Next is Christine Falls Viewpoint, again with a focused 20-minute stop. You’ll see Christine Falls under the old stone bridge, which gives the view a “framed” look—great for photos and a nice visual break from the glacier-and-mountain angle.
If you like waterfalls, you’ll probably find this portion of the day to be a hit. If you don’t love them, that’s still okay—you’ll get them without being trapped in waterfall mode all day. You can pace your time on photos and then move on.
Reflection Lake: The Mirror Moment (When Conditions Cooperate)
One of the signature attractions is Reflection Lakes—the spot where Mt. Rainier is often reflected in summer. You’ll get about 20 minutes here for views and photos.
In winter, though, things change. The road closure note matters, because it’s a reminder that Mt. Rainier is a place where access can shift quickly with weather and snow. If you visit in colder months, plan for the possibility that you’ll be seeing the winter version of the lake environment rather than the classic mirror.
This is why guided stops help. Instead of you guessing where the best angle is or worrying whether you’re there at the right time, you’re given a structured window to get the shot and enjoy the moment.
Longmire: Old-Growth Forest at Lower Elevation
To keep the day from feeling like only one altitude zone, you’ll also visit Longmire. You’ll walk through old-growth forest in the national park near Longmire at lower elevation, with about 30 minutes set aside.
This stop is valuable because it gives you a different Rainier “story.” Paradise is the high-elevation, glacier-and-view setup. Longmire is your calmer look at the forest side of the park—trees, shade, and that big-old woods feel.
Even if you’re mainly in Mt. Rainier for dramatic views, I’d still treat Longmire as a must-do. It’s often the part where you notice details you’d miss if you were rushing only for the biggest scenery.
Stops That Feel Like Photo Ops, Without Feeling Like a Script
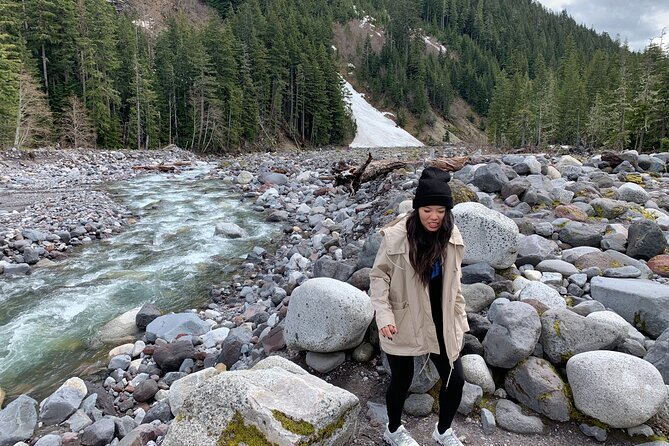
A common fear with highlight tours is that you’ll spend more time waiting than exploring. This tour tries to reduce that by building in enough time at each meaningful location: picnic hiking at Paradise, waterfall walking at Narada, short viewpoint time at Christine Falls, and quick but real breaks at Reflection Lakes and Longmire.
There are also panoramic viewpoint opportunities along the drive after the Paradise hike. You’re not just looking through windows the whole time. You’ll get pull-over moments where the guide can help you orient yourself—what you’re seeing, how the terrain connects, and where to stand for photos.
In practice, that matters because Mt. Rainier can look “simple” until you realize the area is a layered set of zones—glaciers, forest, rivers, and falls all tied together by elevation. A guide helps you convert that into an understandable, photogenic route.
Gear and Comfort: Trekking Poles, Water, and Traction
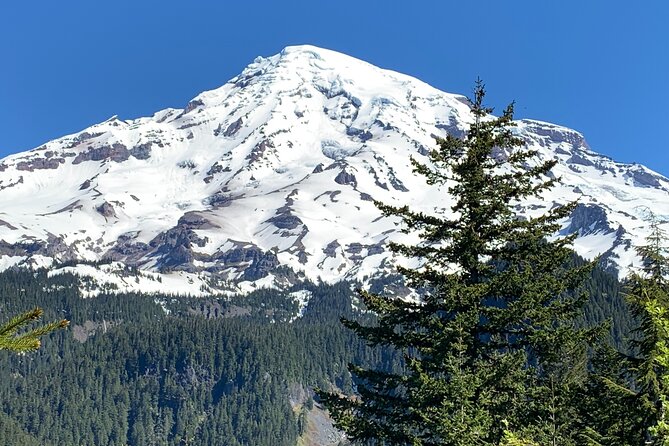
This tour is surprisingly gear-minded for the price point. You get bottled water and trekking poles. In the cold season, you also get snowshoes and crampons—which is a huge deal if you don’t travel with winter traction.
The transport is air-conditioned, which matters because the drive time is long and summertime heat can build up in a vehicle. Even then, consider that weather and comfort are never identical for everyone in a small van: you’re there to prioritize the outdoor stops, but you still want to dress in layers.
Practical tip: wear shoes that match the season. If you’re going in a cooler month, expect traction needs. The tour includes crampons, but the whole point is safer footing and more confidence, not “somehow make it work.”
Getting There From Seattle: Drive Time and Pickup Options
This is the real trade-off: you’re committing to a long ride. Expect roughly two hours each way from Seattle to the park area, plus total day time around 10 to 11 hours. If you’re the type who needs frequent breaks, plan for that travel rhythm.
Pick-up and drop-off are in Seattle downtown at 415 Pine St, Seattle, WA 98101, with an additional option near the Space Needle if requested. Either way, you’re starting and ending in the same general meeting point area.
This tour’s value is that it removes the logistical headache of driving into the park area yourself—especially on a day when parking and timing can get tricky. You show up, get transported, and get the structured walking plan.
Bring patience for the drive. Bring something for time passing—music, reading, or offline content.
Who This Tour Is Best For (And Who Should Rethink)
I think this tour is a strong fit if you:
- Want classic Mt. Rainier highlights in one day
- Like guided route choices and stop timing
- Prefer a small-group atmosphere (max 14 travelers)
- Can handle short, steep sections without needing a leisurely flat walk
It’s also a good option if you’re visiting in November–June and want snow travel support without buying your own gear. The tour provides snowshoes and crampons, and it’s designed for people who don’t have experience.
If you have knee or hip problems, it’s not recommended. The Paradise hike may be short, but uphill effort and uneven terrain can be tough. Also, because it’s a long day with significant time outdoors, you’ll want to match your fitness level to the “moderate physical fitness” requirement.
Price and Value at $179: What You Get for the Money
Let’s be honest about value. $179 isn’t cheap for a day trip. But this tour bundles things that add up quickly:
- Transportation from Seattle in a climate-controlled vehicle
- Park admission for the Mt. Rainier portion
- Water, trekking poles, and seasonal traction gear
- A guide-led plan that takes you to multiple highlights without you coordinating each one
The included gear is a key value driver. If you had to rent snowshoes and traction on your own in winter/spring, that cost and hassle can rise fast. Even in summer, trekking poles are one less thing to carry or buy.
You’re also paying for the “how” of the day—where to go first, when to stop, and how to make the timing work so the best spots aren’t missed. On a mountain, those small timing choices matter more than they do on a city walking tour.
The big thing you should factor in is the driving time. You’re paying for access and guidance, not for avoiding time in the van entirely.
Should You Book This Mt. Rainier Highlights Tour?
I’d book it if you want a guided day that hits the essentials: Paradise, glacier views, waterfalls, Reflection Lake, and old-growth forest stops—plus gear support that changes by season. It’s especially compelling if you’re traveling without a car or without winter hiking gear.
I’d also consider it if you value a calm group size and a guide who helps you pace the hike. Guides named Susan Hill show up in the feedback with strong praise for being patient and informative, and other guides like Rachel, John, Nate, and Matt are also mentioned as helpful and accommodating.
Skip it or choose a different style of tour if your joints don’t like uphill steps, because the Paradise hike is the part most likely to test you. And if you’re short on time, understand that this is still a full-day commitment, not a quick half-day escape.
If you go with the right expectations—gear for the season, a steady uphill pace mindset, and patience for the drive—this is a very practical way to experience Mt. Rainier’s biggest hits without turning the trip into a logistics project.
FAQ
How long is the Mt. Rainier day tour?
The tour runs about 10 to 11 hours.
Where do I meet the tour in Seattle?
The start meeting point is 415 Pine St, Seattle, WA 98101, and you return back to the meeting point at the end.
Is lunch included?
No. Lunch isn’t provided. You can bring your own picnic, pick up lunch items at a grocery stop on the way, or use the cafeteria at the visitor center.
Do I need hiking experience in winter or spring?
No. From November to June, the tour uses snowshoeing instead of hiking, and it’s designed for people with no experience required.
What gear is included?
Included items are bottled water, trekking poles, snowshoes, and crampons (seasonal as needed), plus an air-conditioned vehicle and all fees and taxes.
How much walking/hiking is involved?
You’ll hike about one mile from the Paradise visitor center to the picnic area and about one mile back, plus shorter walks such as going to the bottom of Narada Falls and viewpoints/stops at other locations.
Is this tour okay if I have knee or hip problems?
It’s not recommended for travelers with knee or hip problems.