REVIEW · MOSHI
Best 7 Days Machame Route group hiking on Kilimanjaro
Book on Viator →Operated by Rede Tours and Safaris (Amore African Safari LTD) · Bookable on Viator
A climb of Kilimanjaro is not a walk in the park. The Machame (Whiskey) route gets you big scenery and a classic south-to-north challenge, with enough time to acclimatize for a summit attempt.
I like the way this trip is set up for real mountain rhythm: you start in forest, rise through moorland, then end with the late-night push to Uhuru Peak at 5,895 m. I also like the team focus described by past hikers—people repeatedly credit guides like Nalisis, plus support from porters and chefs, for making the days run smoothly.
The main consideration is simple: Machame is tough. The itinerary is relatively shorter than some alternatives, so you need to be mentally ready for steep, rocky hiking and a very cold summit night.
In This Review
- Key things to know before you go
- Machame Route: the Whiskey Trail in plain terms
- Getting to Moshi and lining up the start
- Day-by-day: what each mountain day feels like
- Day 1: Machame Village to rainforest ascent and first camp
- Day 2: Forest to moorland, then Shira Plateau’s cold shock
- Day 3: Shira ridge and the Shark’s Tooth (Lava Tower) to Barranco
- Day 4: Barranco to Barafu via Karanga skip and the South Circuit feel
- Day 5: Midnight summit push to Stella Point and Uhuru Peak
- Day 6: Summit certificate day and a muddy Mweka descent
- Price and what you’re truly paying for ($2,080)
- The team factor: guides, porters, and camp support that matter
- Who this Machame climb suits (and who should think twice)
- What to pack and how to think about conditions
- Should you book this Machame route?
- FAQ
- FAQ
- How long is the Machame climb in this package?
- Where does the climb start and when?
- How much does it cost?
- What’s included in the price?
- What is not included?
- What time does the summit attempt begin?
- What should I expect on the descent?
- What is the cancellation policy?
Key things to know before you go
- Machame’s altitude profile: forest to moorland to high plateau, then a summit night that starts around midnight
- Shira Plateau exposure at 3,840 m, with nights that can drop well below freezing
- Lava Tower and Arrow Glacier area on the way to Barranco, including the Shark’s Tooth landmark
- A stamina test: the steepest, most demanding stretch includes the trek toward Stella Point (18,600 ft)
- Practical downhill reality: the Mweka descent can be wet and muddy, so gaiters and trekking poles matter
Machame Route: the Whiskey Trail in plain terms
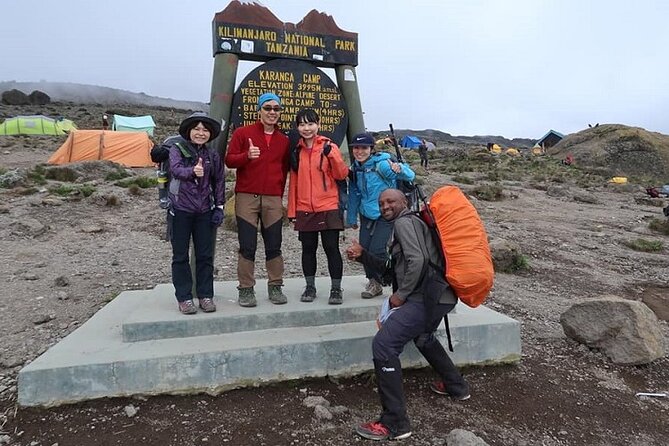
Machame is often called the Whiskey route, and for good reason: the day-to-day mix can feel like a steady pour—up, up, and then up again. It’s also the most popular Kilimanjaro route, which usually means the logistics are well-known, camps are established, and you won’t feel totally lost at every turn.
This climb approaches Kilimanjaro from the south. You’ll start with a short drive from Moshi area to Machame Gate, then move into rain forest quickly. From there, you’ll gradually shift zones: rain forest to moorland, then up onto Shira Plateau, and later through areas tied to the southern ice field route before turning toward Barafu.
The reward is huge. On clear days, you get multiple angles on the mountain, with Kibo and Mawenzi visible from camp positions along the way. And on summit morning, you’re treated to that famous crater edge feeling—thin air, big sky, and the kind of sunrise that makes your brain forget how tired you are.
Still, Machame is not a beginner route. It can be steep and challenging, especially because the schedule is shorter than some longer climbs.
Getting to Moshi and lining up the start
The experience is based in Moshi, Tanzania. You’ll begin at Shanty Town (start time listed as 8:00 am), then the plan includes transportation from the Arusha side to Machame Village and Machame Gate when conditions allow.
There’s a real-world detail worth planning for on Day 1: depending on road conditions, you may either drive part of the way and then walk about 3 km over muddy ground to the gate area, with that walking section taking roughly an hour. That means comfortable hiking shoes that can handle mud are not optional.
Once you register at the gate office, the hike starts right away through rain forest. Bring a good attitude for damp trail conditions, because in the forest a light rain can turn the path into slick mud fast.
Day-by-day: what each mountain day feels like
Day 1: Machame Village to rainforest ascent and first camp
After an early breakfast, you’ll receive a packed lunch and head toward Machame Gate. The hike enters the rain forest almost immediately, and this is where the mountain sets its tone: cool, humid, and sometimes rainy.
You’ll have a welcome lunch stop about halfway, then continue uphill until you reach your camp at the end of the day. Expect the trail to feel heavy underfoot if it’s been wet. The good news is that this first day helps your body warm up into climbing mode without the “stare at the sky and fight” feeling that comes later.
What to love here: you’re surrounded by forest change as you gain elevation, and you get an early sense of Kilimanjaro as a real mountain system—not just a single summit event.
Watch-outs: rain makes footing tricky, so go slow and keep your balance. If you rush on day one, you’ll pay for it on summit night.
Day 2: Forest to moorland, then Shira Plateau’s cold shock
This is the day the hike really starts “feeling like Kilimanjaro.” You rise, eat breakfast at camp, then climb through the forest zone for about an hour or so. After that, you move into a more gradual moorland gradient for roughly two hours.
Then comes the transition to Shira Plateau. You’ll hike up toward and onto the plateau at about 3,840 m. Along the way, if visibility is good, you can spot features to the east, including the Western Breach with glaciers, and you’ll also be due west of Kibo.
At Shira campsite, it’s exposed. The nights here can be colder than the previous night, with temperatures dropping to well below freezing. Even if your day was calm-ish, your body will notice the cold after dark.
What I love about this day: the plateau gives you that “oh wow, we’re really up here” feeling, and you get a better sense of the route geometry.
The consideration: pack for serious cold at camp. Warm layer strategy matters more than fancy gear.
Day 3: Shira ridge and the Shark’s Tooth (Lava Tower) to Barranco
From Shira Plateau, you continue up a ridge, passing key junctions on the way toward the Kibo area. Then your direction turns southeast toward Lava Tower, nicknamed the Shark’s Tooth.
After Lava Tower, you reach the area near the Arrow Glacier (the route guidance calls it out at about 16,000 ft). Then the day changes mood: you start descending to Barranco Camp at about 13,000 ft.
This is where the acclimatization logic shows up in a practical way. The description for the day makes a point that even though you end around the same elevation as when you started, the day is important for helping your body adapt. That matters because it’s easy to think you only acclimatize when you keep going higher.
At Barranco Camp, you rest and enjoy dinner and your overnight. This camp stop is not just a break—it’s part of your summit readiness.
What to love here: you’re getting dramatic high-mountain landmarks without pretending the whole climb is one long straight line.
What to watch: even if it’s a “down” day, the terrain can still feel strenuous. Keep moving steadily, and don’t treat acclimatization like a checkbox.
Day 4: Barranco to Barafu via Karanga skip and the South Circuit feel
Breakfast starts day four, then you leave Barranco and continue on a steep ridge. You pass the Barranco Wall and then head toward Karanga Valley campsite.
Here’s an important detail in this 6-day variation: you then leave Karanga, hit the junction with the Mweka Trail, and continue up to Barafu Hut—meaning you climb without staying at Karanga for an extra night. Barafu Hut is the camp where you rest, prepare, and gear up for summit night.
This point is described as completing the South Circuit, with views of the summit from many angles. You can also see Mawenzi and Kibo from here, which makes the “where are we going?” question feel much more real.
What I like about this setup: you arrive at the summit camp with a strong sense of orientation. That matters in the dark later.
The consideration: you’re heading into the hardest day soon, so focus on pacing and sleep quality at Barafu.
Day 5: Midnight summit push to Stella Point and Uhuru Peak
Day five starts brutally early. You move out between midnight and 2:00 am, and the climb heads toward the summit between the Rebmann and Ratzel glaciers.
This section is described as the most mentally and physically challenging part of the trek. You’ll ascend through heavy scree (route notes call it heavy screed) up toward Stella Point on the crater rim, at about 18,600 ft.
Stella Point is where you stop briefly. Then, weather permitting, you’re rewarded with the most memorable sunrise you’re likely to see on Kilimanjaro. From there, you may encounter snow while continuing for about an hour to the summit.
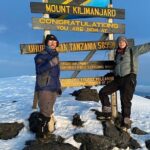
At Uhuru Peak, you reach the highest point on Mount Kilimanjaro and the continent of Africa, at 5,895 m. It’s the moment you came for—thin air, cold breath, and a view that makes your brain go quiet.
What to love: the way the route funnels you onto the crater rim and turns the whole day into one focused goal.
What to watch: this is where people get emotional fast, but you still need smart footwork. Slow steps, steady breathing, and patience are your friends.
Day 6: Summit certificate day and a muddy Mweka descent
After breakfast, you start descending to Mweka Park Gate. You get your summit certificates at the gate, then a vehicle meets you to drive back to Moshi.
This day can be wet and muddy at lower elevations. If you want to protect your knees and avoid ankle slips, think about using gaiters and trekking poles. The route notes also suggest that shorts and t-shirts may be enough at lower elevations, but you should still keep rain gear and warmer clothing available.
What I like about the end of the climb: you get a clear finish point, a paper proof moment (certificates), and then a quick transition back toward comfort in Moshi.
Watch-out: don’t assume the hard part ends at the summit. The descent can still punish your legs.
Price and what you’re truly paying for ($2,080)
At $2,080 per person, this is not a budget Kilimanjaro deal. What you’re paying for is the package structure: all fees and taxes are included, plus private transportation and airport pick up, and the climb comes with meals—breakfasts (6), lunches (6), and dinners (5).
You’re also paying for the mountain support that makes a summit attempt possible. The route itself is hard; the real value is in having an organized system of guides, porters, and a chef who handles food prep and camp operations. In multiple accounts, people credit guide Nalisis and also mention Omary as part of a strong team that helped them reach Uhuru Peak.
One key thing to keep in mind: visa, tipping, flight, and personal hiking equipment are not included. So your total trip cost will be higher than the sticker price once you add those items.
Overall, if you want a smooth, guided climb with meals and transfer logistics handled, this price can be reasonable. If you’re trying to DIY everything, it’s probably not the best match.
The team factor: guides, porters, and camp support that matter
Kilimanjaro has a lot of moving parts: timing, altitude pacing, camp setup, and food. This experience is built around that reality, and the strong feedback centers on the human side of climbing.
People talk about an inspiring team and a guide who played a big role in helping them make it to the top. They also mention good tents and solid hiking services, plus hospitality from arrival to departure. Those details matter because on summit night, you don’t want uncertainty. You want someone to manage the plan while you focus on your breathing and your next careful step.
That doesn’t mean the climb is easy. It just means you’re less likely to feel lost or unsupported when conditions get hard.
Who this Machame climb suits (and who should think twice)
This is best for more adventurous hikers who can handle steep trails and rocky ground. It’s also a good fit if you have some high altitude, hiking, or backpacking experience, because you’ll recognize how your body reacts when elevation steals your power.
You should also consider it if you want the classic Machame storyline: rainforest start, high plateau nights, a crater rim summit bid, then a final push downhill to certificates.
This may not be your best match if you want an easier pace or lots of buffer days. The shorter nature of the Machame schedule means you’ll likely feel the pressure more intensely when fatigue stacks up.
What to pack and how to think about conditions
The route data gives you clues about weather and terrain, and you can plan accordingly:
- Forest day: expect rain probability and muddy, slippery trails
- Shira Plateau: expect exposed cold, potentially below freezing at night
- Summit night: expect scree/rock and cold enough to require serious layering
- Mweka descent: expect wet and muddy conditions again at lower elevation
So focus on footwear you trust, layers you can adjust, and rain protection you’ll actually use. The guidance specifically mentions gaiters and trekking poles for the descent, plus rain gear and warmer clothing for the end.
Should you book this Machame route?
If you want a classic, highly popular Kilimanjaro climb that takes you through Shira, Lava Tower, Barranco, Barafu, and then the midnight summit push, this option makes sense. The structure is strong: meals are built in, transport is handled, and the team support seems to be a major reason people succeed.
Book it if you’re comfortable with difficult, steep hiking and you’re ready for cold nights and a hard summit day. Consider a different plan if you know you’re sensitive to altitude, hate aggressive uphill days, or want a slower climb with more buffer.
FAQ
FAQ
How long is the Machame climb in this package?
The duration is listed as about 6 days (often marketed as a 6 to 7-day Machame experience depending on the variation).
Where does the climb start and when?
It starts at Shanty Town, Tanzania, with a start time of 8:00 am.
How much does it cost?
The price is $2,080.00 per person.
What’s included in the price?
Included are all fees and taxes, private transportation, airport pick up, lunches (6), breakfasts (6), and dinners (5).
What is not included?
Visa, tipping the crew, flights, and personal hiking equipment are not included.
What time does the summit attempt begin?
You continue toward the summit between midnight and 2:00 am.
What should I expect on the descent?
The descent down to Mweka Park Gate can be wet and muddy, and gaiters and trekking poles are recommended. Rain gear and warmer clothing are also suggested.
What is the cancellation policy?
Free cancellation is offered if you cancel up to 24 hours in advance for a full refund.