REVIEW · PAGE ARIZONA
Page: Antelope Canyon X Hiking Tour with Photo Tour Option
Book on GetYourGuide →Operated by Wannar Travel · Bookable on GetYourGuide
The light inside Canyon X is a wow lesson. I love the way sunlight streams through the slot canyon walls and makes the colors pop on the walk in, and I also love the guidance from a Navajo guide who explains what you’re seeing and how to photograph it. The only real drawback is the rule set: you can’t bring bags, and the footing is on a short hike inside the canyon, so it’s not a fit for everyone.
You’ll start outside Page at Antelope Canyon X by Taadidiin Tours, then ride out in a 4×4 for about 3 miles to the canyon mouth. After check-in, you’ll hike roughly 100 meters into Antelope Canyon X, walk through the main sections, and come back at the end of your time slot.
Pick the extended option if photos are the goal. The 3-hour photography tour gives more time—and it’s the one that allows a tripod and one camera bag—while the shorter hike keeps things simpler with just a camera or phone.
In This Review
- Key things that make this tour worth your time
- Getting To Canyon X: From Page to the Navajo Nation Drive-In
- The 4×4 Ride and the 100-Meter Canyon Walk
- Inside Canyon X: Two Slot Canyon Sections and the Light You Came For
- Navajo Guide Storytelling and Photo Tips That Actually Help
- 90-Minute Tour vs. 3-Hour Photography Tour (Tripod Rules)
- The shorter tour (great for first-timers)
- The 3-hour photography tour (best for serious shooting)
- What to Bring (and What to Leave Behind) for a Stress-Free Visit
- Price and Value: Is $95 for Antelope Canyon X a Fair Deal?
- Who Should Book This Tour (and Who Should Skip It)
- Getting the Most From Your Camera (Handheld or Tripod)
- Should You Book This Antelope Canyon X Tour?
- FAQ
- How long is the Antelope Canyon X hiking tour?
- Where do I meet for the tour?
- What’s included in the price?
- Can I bring a tripod or camera bag?
- What should I bring with me?
- What items are not allowed on the tour?
- Who is the tour not suitable for?
- What is the cancellation policy?
Key things that make this tour worth your time
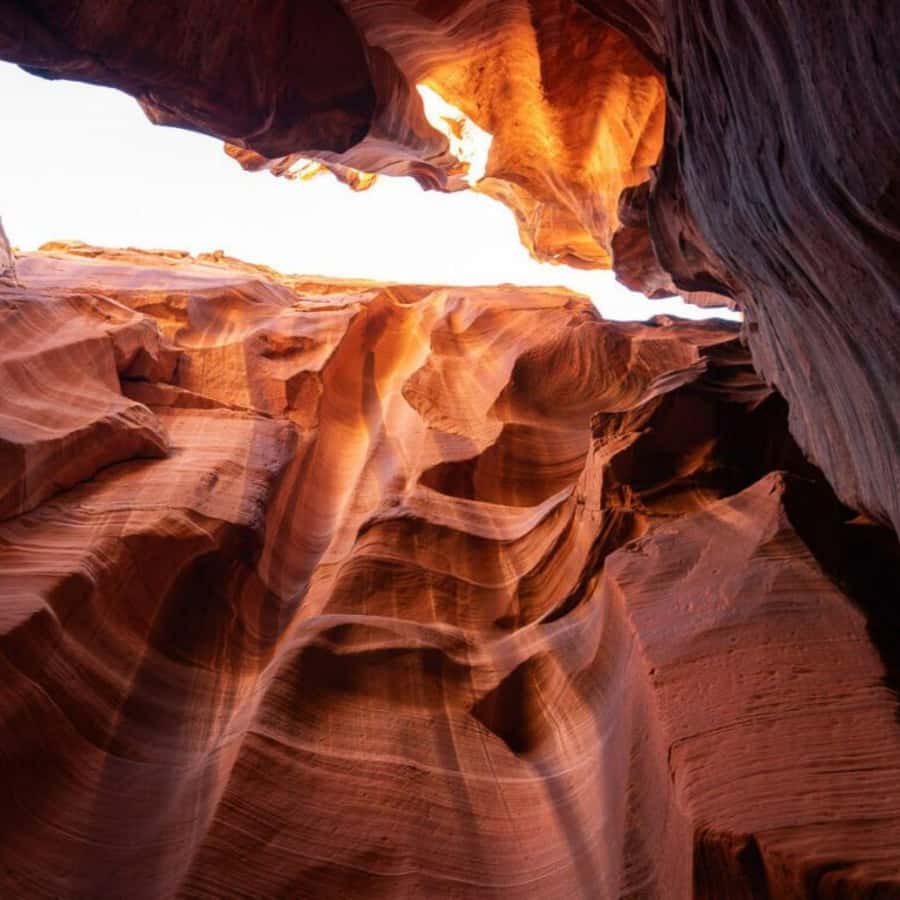
- Navajo guide interpretation: you’ll get context on how the canyon formed and its meaning in local Navajo culture
- Two canyon sections to explore: you move through more than one part of Antelope Canyon X, not just a quick corridor
- Light-focused slot canyon experience: you’ll see how the angles of the sun change what the walls look like
- Photo option that’s actually photo-friendly: the 3-hour tour is built for tripod use and longer shooting time
- Short hike, big payoff: about 100 meters in-system, so you spend time looking instead of walking for hours
Getting To Canyon X: From Page to the Navajo Nation Drive-In
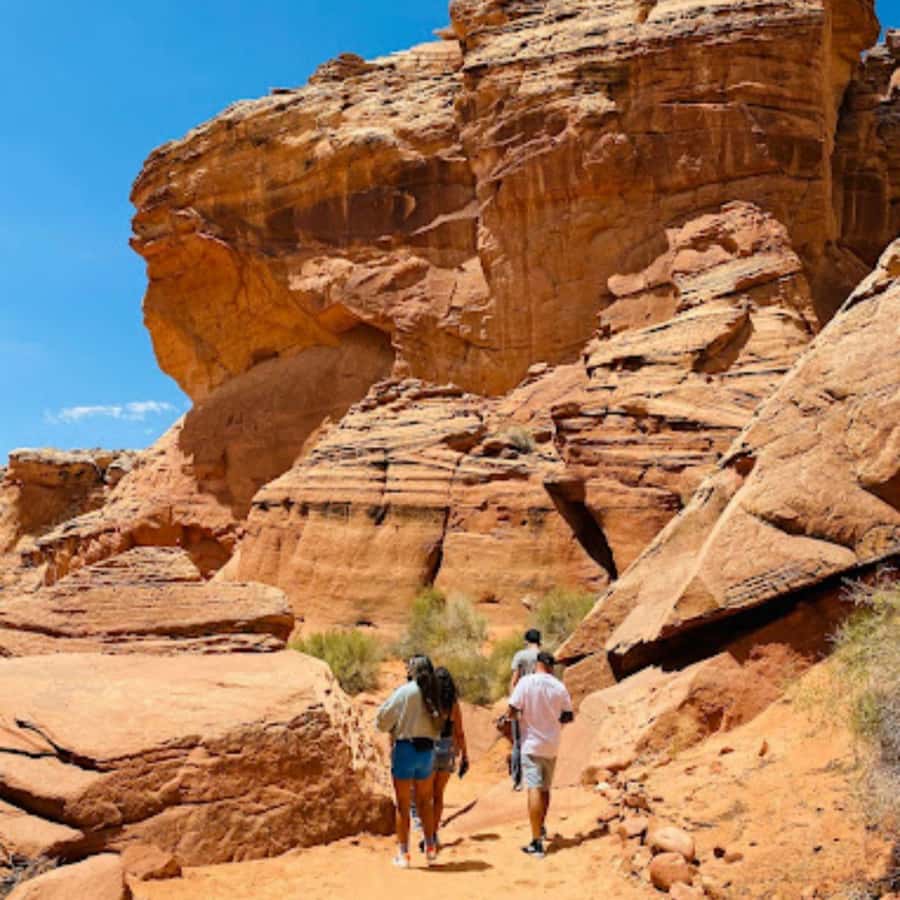
Antelope Canyon X is run from outside the city of Page, and the whole experience starts in the Navajo Nation. That matters, because it changes the feel from a theme-park stop into something more grounded: you’re visiting a working community with real stewardship of land.
Before you head into the canyon, you’ll check in at Antelope Canyon X by Taadidiin Tours, then you’ll travel out by 4×4 to the canyon mouth. It’s a short vehicle transfer, not a long remote expedition, but it keeps the experience moving and helps you get to the right place for your hike.
This is also one of the places where showing up prepared helps a lot. You’ll want your ID ready, because you’ll need passport or ID card, and you should plan your clothing for a canyon setting (comfortable shoes beat fashion almost every time).
You can also read our reviews of more hiking tours in Page Arizona
The 4×4 Ride and the 100-Meter Canyon Walk
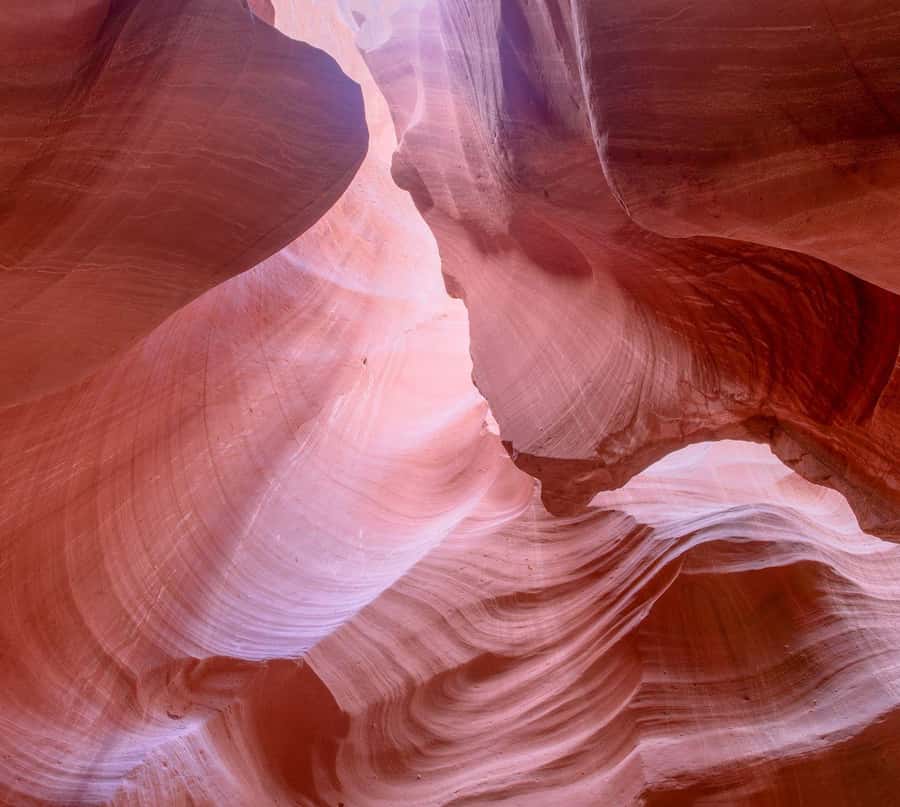
The flow is straightforward. After check-in at the meeting point, the group rides about 3 miles in a 4×4 to the entrance area. Then comes the walk: you go in about 100 meters into Antelope Canyon X.
Why that detail matters: the hike isn’t long, but you are still inside a slot canyon environment. The ground can feel uneven, and you’ll be doing short steps while you look up and forward for light and formations. You don’t need trail-running stamina, but you do need steady feet and willingness to move slowly through tight, photo-focused space.
Also remember the practical rule: you can bring a camera or phone, but you can’t bring much else. That’s designed to protect the canyon experience and keep the route manageable. So plan to travel light, and consider wearing a day bag-free setup where you can keep your hands free for balance.
Inside Canyon X: Two Slot Canyon Sections and the Light You Came For
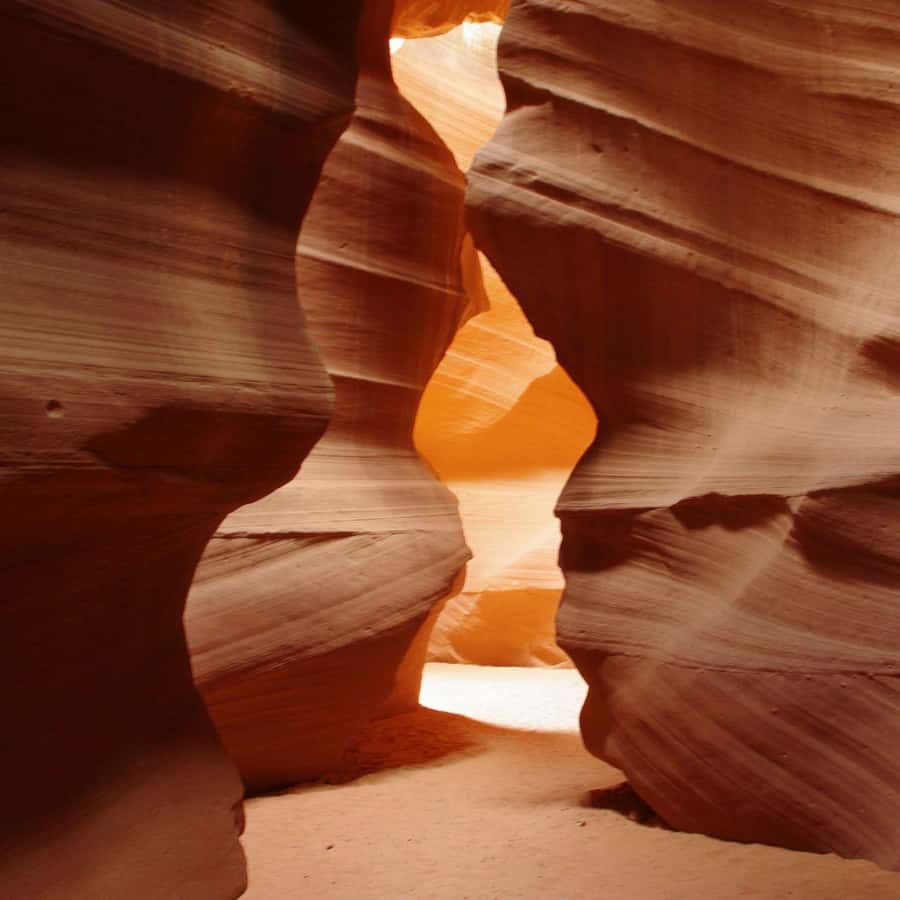
Once you’re inside Antelope Canyon X, the tour is centered on what the canyon does with light. The walls and curves create that signature slot effect: light comes in from above, and the color and intensity shift depending on where you stand.
You’ll see two parts of the slot canyon during the visit. That’s a big deal for value. Instead of just walking a single stretch for an hour, you get more variety in angles, textures, and photo perspectives within the same tour time.
What to watch as you go:
- Look up for where the sunbeam hits the wall faces. That’s where “photo moments” happen fast.
- Turn your body slowly rather than forcing shots with arms fully extended. In narrow spaces, stability matters.
- Give the guide a beat to explain what you’re seeing, then test it with your camera. The canyon often makes more sense after someone points out formation and light behavior.
The guide also covers why the canyon looks the way it does—how water and geology shaped it over time—and you’ll connect that with what the area means in local Navajo culture. Even if you’re not a geology person, it helps you spot the formations you’d otherwise just label as pretty.
Navajo Guide Storytelling and Photo Tips That Actually Help
The guide component is one of the strongest reasons to book this tour. You’re not just paying for access; you’re paying for interpretation—what you’re looking at, why it matters, and how to get better pictures in a place where the light can change quickly.
On past departures, guides including Rick and Al have been noted for doing two key things well: sharing clear canyon information and giving practical photography guidance. That combination is gold. A canyon like this can feel confusing if you don’t know where to aim your camera, but with a guide’s direction, your time becomes more productive.
A few smart habits to copy from a good guide-style approach:
- Shoot in short bursts instead of long holds, then adjust angle slightly.
- Watch for bright bands where light hits directly; those areas can help your composition even if the rest looks darker.
- If your phone struggles, lower exposure or switch modes rather than giving up. You’re standing in changing light, not under a single studio lamp.
If you’re traveling as a family, the storytelling element also tends to make the canyon feel more than just Instagram frames. You’ll come away understanding what you saw, not just seeing it.
90-Minute Tour vs. 3-Hour Photography Tour (Tripod Rules)
You’ll usually have two ways to do it: the shorter 90-minute canyon hike window, or an extended 3-hour photography-focused tour. Both include the canyon entry and a guided experience, but the time difference changes what you can accomplish.
The shorter tour (great for first-timers)
The standard hike gives you a guided introduction, enough time to see the main sections, and time to take photos without getting stuck in camera mode for the whole session.
For this option, the restrictions are strict:
- You can bring your camera or cell phone
- You can’t bring tripods, monopods, selfie sticks
- Bags of any size are not allowed
So your photo plan has to be handheld. That’s fine. The canyon does the heavy lifting with the light. But if you’re hoping to spend time on slower compositions, stitching, or tripod-level stability, the shorter time can feel a bit tight.
The 3-hour photography tour (best for serious shooting)
Choose the extended option if you want time to work a scene. The big advantage is that you can bring a tripod and one camera bag (plus your camera). That changes everything: you can wait for the light to hit, reposition, and take multiple angles without rushing.
This option is ideal if:
- You want crisp, low-noise images in uneven light
- You’re bringing a heavier camera setup
- You like slowing down and refining shots instead of racing the clock
Timing affects the look too. Some tours have been booked around the day’s strongest sun, and you’ll often find that higher-light periods increase the effects inside the canyon. If you have flexibility, consider choosing a time based on when the sun lines up with the canyon openings you’ll be facing.
What to Bring (and What to Leave Behind) for a Stress-Free Visit
This tour runs smoothly when you follow the simple rules. The canyon experience is one of those where “packing light” is not a suggestion—it’s part of the system.
Bring:
- Passport or ID card
- Comfortable shoes with decent grip
- A camera or phone (this is allowed)
Don’t bring:
- Pets
- Tripods (unless you’re on the 3-hour photography tour)
- Backpacks or bags of any size
- Tripods/monopods and selfie sticks on the standard hiking tour
For the 3-hour photography tour specifically:
- A tripod is allowed
- You can bring one camera bag and your camera
Practical tip: if you’re used to carrying a small day bag, switch that habit here. Wear what you need, keep valuables secure, and plan to carry essentials only. Your hands and balance will thank you inside narrow sections.
Price and Value: Is $95 for Antelope Canyon X a Fair Deal?
At $95 per person, the cost sits in the “pay for access and guidance” category. This isn’t a do-it-yourself hike where you only pay for a map and gas. You’re paying for:
- Canyon entry access
- A guided tour with Navajo interpretation
- A Navajo Nation permit fee
- Basic support like bottle water
So the value question is simple: do you want the guide and the planned entry experience, or do you prefer independent wandering?
If you want a guided, time-efficient canyon visit with photo help, $95 can feel fair because you’re not spending hours figuring out timing, angles, and rules on your own. The guided explanation also turns the canyon into something you understand, not just something you pass through.
If you’re a very casual visitor who only wants a few quick phone pictures, the shorter time window may be enough, and that keeps things efficient. If you’re a photography-focused traveler, the 3-hour option often justifies the extra commitment because tripod time changes your results.
Who Should Book This Tour (and Who Should Skip It)
This tour is best for people who:
- Want a guided slot canyon walk without a long hike
- Care about photography and want practical coaching
- Prefer a short, well-run outing instead of all-day travel blocks
- Enjoy cultural context from a Navajo guide
It’s not suitable for:
- Pregnant women
- People with back problems
- People with mobility impairments
- People with heart problems
- Wheelchair users
- People over 80 years (and the information also notes limits up to 95 years)
If you’re in any gray area on mobility or health, treat the listed restrictions as a real signal. Slot canyon spaces are short-distance but can be physically demanding in the moment.
Getting the Most From Your Camera (Handheld or Tripod)
Even if you’re doing the standard option, you can still get strong images. The canyon itself is doing most of the work: curved walls, narrow passage angles, and light streaming from above create natural gradients.
Here’s how to think about it:
- Handheld photographers: focus on composition and timing, not perfection. Take a shot when the light hits, then adjust angle slightly for the next frame.
- Tripod photographers (3-hour option): use the extra time to explore different positions and wait for the light behavior to shift. Set up, then refine rather than constantly packing and unpacking.
Also, don’t fight the constraints. The no-bag/no-tripod rules on the shorter tour are there for a reason. Plan around them and you’ll feel less stressed.
Should You Book This Antelope Canyon X Tour?
Book it if you want a guided Antelope Canyon X experience with Navajo interpretation and you like the idea of being helped with photography instead of guessing. The price is less about “just entry” and more about time, access, and a guide-led experience that makes the canyon easier to read and photograph.
Skip it (or reconsider) if you need wheelchair access, have serious mobility or health constraints, or you’re hoping to bring lots of gear. This is a hands-on visit, and the rules are part of the deal.
If you’re deciding between the two durations, here’s a simple call: choose the 90-minute tour if you’re mainly here to see the canyon and take a solid set of handheld photos, and choose the 3-hour photography tour if you want tripod time and more breathing room for lighting changes.
FAQ
How long is the Antelope Canyon X hiking tour?
It runs from 90 minutes up to 3 hours, depending on the tour option you choose.
Where do I meet for the tour?
Meet at Antelope Canyon X by Tadidiin Tours.
What’s included in the price?
You get the Canyon X entry ticket, a guided tour, bottle water, and the Navajo Nation permit fee.
Can I bring a tripod or camera bag?
For the shorter hiking tour, tripods are not allowed. For the 3-hour photography tour, a tripod and 1 camera bag are allowed.
What should I bring with me?
Bring a passport or ID card and wear comfortable shoes. You’re allowed to bring a camera or cell phone.
What items are not allowed on the tour?
Pets are not allowed, and bags/backpacks are not allowed. Tripods are not allowed on the standard hiking option, and selfie sticks are also listed as not allowed.
Who is the tour not suitable for?
The tour info says it is not suitable for pregnant women, people with back problems, people with mobility impairments, people with heart problems, wheelchair users, and people over 80 years (with an additional note up to 95 years).
What is the cancellation policy?
Free cancellation is available up to 4 days in advance for a full refund.