REVIEW · ROTORUA
Rotorua Hiking: Mt Tarawera Guided Volcanic Crater Experience
Book on Viator →Operated by Kaitiaki Adventures Aotearoa · Bookable on Viator
Tarawera crater delivers big views in little time. This half-day guided hike takes you from Rotorua into the Central North Island terrain to reach the crater edge of Mt Tarawera, with history and geology explained as you walk. I really like that you get Rotorua hotel pickup and drop-off, so you can focus on the hike instead of logistics.
What makes it extra worthwhile is the combination of crater-edge 360 panoramas plus hands-on guidance through steep, volcanic ground. Guides such as Jesse, Hauri, Jonathan, Chucky, Deborah, and Dan show up in people’s reports for being friendly, safety-minded, and good at connecting the landscape to the Māori stories and the 1886 eruption. One possible drawback: this is not an easy stroll—expect steep spots, uneven footing, and wind exposure, and people afraid of heights should think twice.
In This Review
- Key highlights that make this hike feel worth it
- Mt Tarawera near Rotorua: why this hike hits harder than you expect
- The 4.5-hour plan: what you’re really doing from start to finish
- Stop-by-stop: Kaitiaki Adventures, Waimangu Valley, Bretts Road, and the crater edge
- Stop 1: Kaitiaki Adventures
- Stop 2: Waimangu Volcanic Valley
- Stop 3: Rerewhakaaitu Bretts Road Camping Area
- Stop 4: Mt Tarawera (crater edge and optional crater section)
- Difficulty level: moderate fitness, steep moments, and fear-of-heights reality
- What to wear and pack so the scree doesn’t ruin your day
- Guides: what really stands out about the storytelling and safety
- Value check: is $121.01 worth it?
- Weather and visibility: how to think about cancellations and wasted views
- The one negative to watch for: transport and shoe mismatch
- Should you book Mt Tarawera Crater with Kaitiaki Adventures?
- FAQ
- How long is the Mt Tarawera guided crater hike?
- Do you include hotel pickup and drop-off in Rotorua?
- Can I choose a morning or afternoon tour?
- What’s included in the price?
- How big are the groups?
- How fit do I need to be?
- Is there an optional scree run?
- Where do the stops happen during the tour?
- What footwear should I wear?
- What if the weather is bad?
Key highlights that make this hike feel worth it
- Small group size (max 20): you get a more controlled pace and better attention on tricky footing.
- Pro guide + real eruption context: you’ll get the why behind what you’re seeing, not just where to step next.
- Waimangu Volcanic Valley scenery stops: multiple viewpoint moments, not a single “look and move on” photo stop.
- Optional crater scree run: can be thrilling, but it demands balance and sensible footwear.
- Pickup included: saves time and stress around finding meeting points in Rotorua.
- Weather matters for the view: the route is outdoors, so clear conditions help the whole experience land better.
Mt Tarawera near Rotorua: why this hike hits harder than you expect
Rotorua is known for geothermal smells, steam, and easy sightseeing. Mt Tarawera is different: it feels wilder, tougher, and more honest. You’re walking on volcanic ground shaped by a major eruption, and the terrain keeps changing as you gain elevation.
The big draw is that you’re not just taking pictures from a distance. You’re moving through the same kind of mixed slopes—scoria, talus, and rocky descents—where you can actually feel the “volcano made this” factor under your feet. That makes the Waimangu Valley viewpoints feel earned rather than handed to you.
You can also read our reviews of more guided tours in Rotorua
The 4.5-hour plan: what you’re really doing from start to finish
This is about 4 hours 30 minutes total. You can go on a morning or afternoon departure, which is handy if you’re trying to fit it between geothermal sites, lake time, and evening plans.
You’ll start with a pickup and head out toward the hiking area, spending time along the way on narration and scenic stops. Then you walk up winding tracks to the crater edge, with time to pause for views and explanation. Some versions of this experience also include an optional scree run into the crater area, depending on conditions and your comfort level.
Stop-by-stop: Kaitiaki Adventures, Waimangu Valley, Bretts Road, and the crater edge
Stop 1: Kaitiaki Adventures
You typically begin at Kaitiaki Adventures. The group format matters here. A small group gives your guide more ability to keep everyone together and adjust pace if the footing gets sketchy.
Expect a short setup moment before you head out. One helpful detail from experience reports: there can be a porta potty stop before you reach the trail start area, which is exactly the kind of “small thing” that prevents a bigger headache later.
Stop 2: Waimangu Volcanic Valley
This is where the story starts making sense. Waimangu Volcanic Valley is tied to the 1886 eruption of Mt Tarawera, when new geothermal features formed—including the youngest geothermal valley in New Zealand at the time. When you stop here, the goal isn’t only photos. Your guide will point out how the eruption reshaped the region.
This stop also functions as a warm-up for your brain: you learn what to look for before you’re up on steeper slopes. If you’re the type who likes to understand what you’re seeing, you’ll enjoy this pacing.
A practical note: if you’re sensitive to wind or cold, plan layers. Even in fair weather, the walking and the open views can bring cooler air around the valley.
Stop 3: Rerewhakaaitu Bretts Road Camping Area
This stop is a breather and a context stop. You’ll get additional orientation before the main push toward Mt Tarawera. It also helps split the day so the hike doesn’t feel like a single long grind from the moment you arrive.
You should still treat this as prep, not vacation. The terrain ahead is volcanic and uneven, so pay attention to your guide’s instructions about steps, balance, and where to walk.
Stop 4: Mt Tarawera (crater edge and optional crater section)
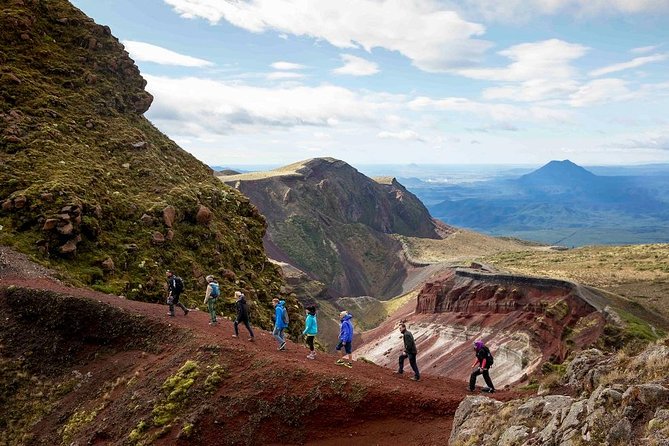
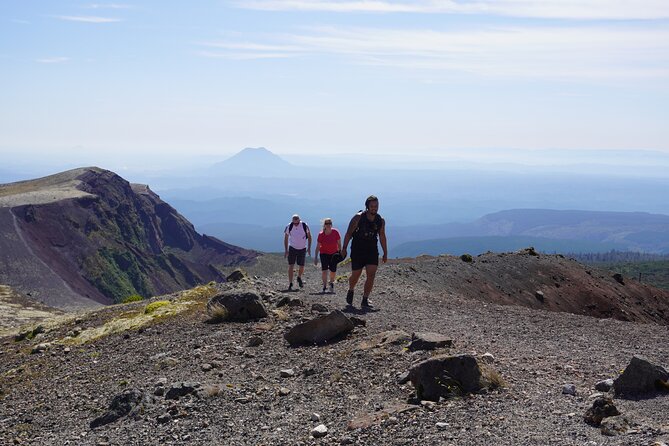
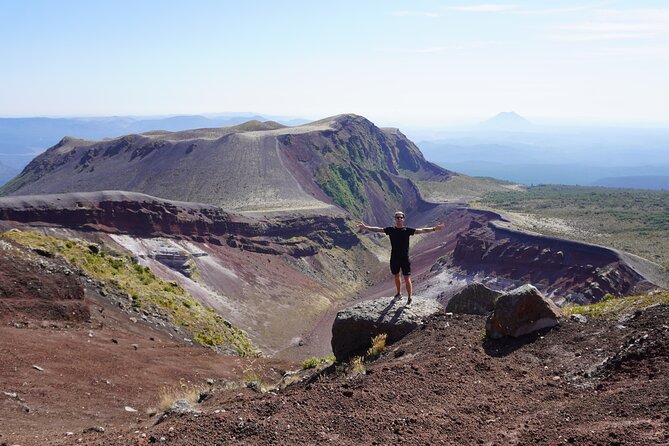
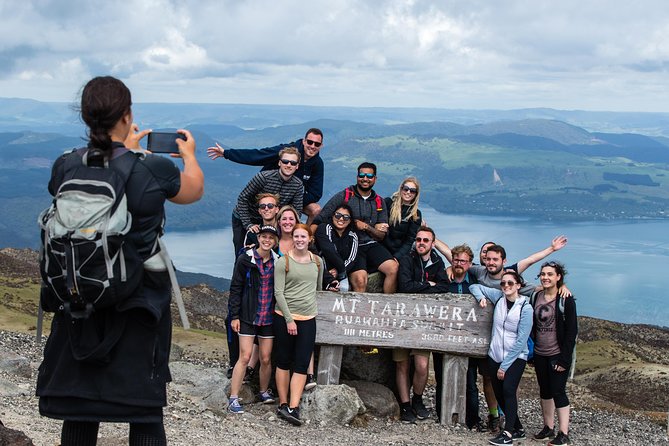
This is the point of the trip. From the base, you follow winding trails up to the crater’s edge. You’ll be able to enjoy panoramic views—people specifically mention 360-degree views when conditions are right.
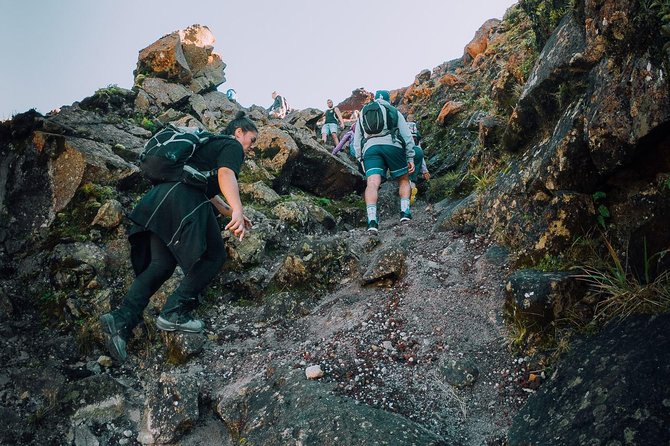
The optional part—when offered—is a scree run into the crater’s heart. That’s the fun factor, but it also explains why this hike isn’t for everyone. Scree and talus can shift underfoot, and some people report scoria getting into boots and causing skin irritation around the ankles.
If you take only one piece of advice from all the reports: prepare for steep, rocky sections. This is not the sort of hike where you can “wing it” in worn shoes.
Difficulty level: moderate fitness, steep moments, and fear-of-heights reality
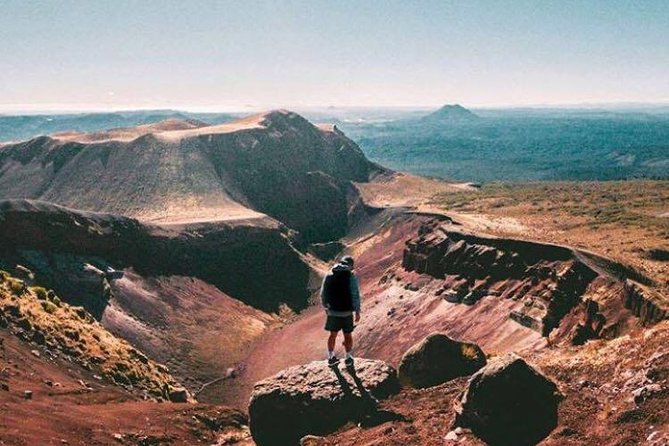
The tour is described as requiring moderate physical fitness. In plain terms: you’re able to hike, but your knees and balance will get tested.
The uphill work can feel tougher than you expect, and the downhill sections can be steep and uneven. People who fear heights have said the descent can be tough emotionally, not just physically. If you’re even slightly unsure, I’d treat that as a signal rather than a challenge coin.
You also need coordination. Rocky ground is where good hikers look calm and less experienced hikers look like they’re negotiating a bad video game level. That’s why the guide matters so much on this route.
The good news: guides often build in rest breaks and adjust pace. People mention being supported during harder segments and feeling cared for through safety-first guidance. Still, you should come ready to work.
What to wear and pack so the scree doesn’t ruin your day
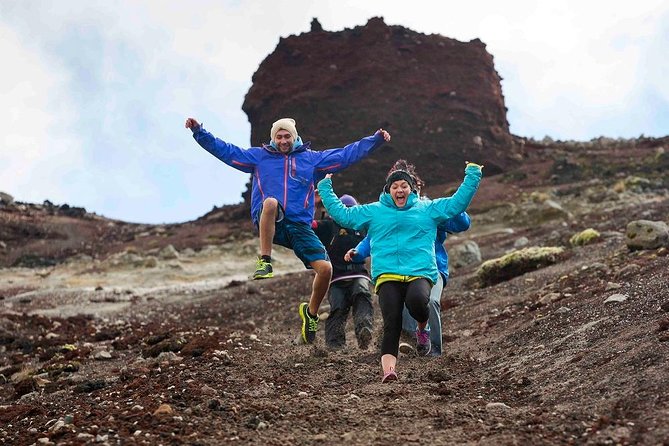
Footwear is the difference between an adventure and a slip-and-slide moment. The strongest repeated advice is: wear good hiking shoes, not casual trainers.
I also recommend higher socks. One of the most specific tips from experiences: higher socks help prevent scoria from cutting the skin around your ankles when it sneaks into your boots on talus slopes. That’s not a minor tweak—it’s the kind of comfort upgrade that can decide whether you finish the hike feeling proud or feeling annoyed.
Bring water. The tour info doesn’t list water, so don’t assume it’s provided. Also pack a couple layers even in warm months. Wind at the crater edge can get sharp fast, and several reports mention cold or windy conditions.
If you forgot boots or you’re uncertain about gear, check what’s available during booking. One provider response mentions boot hire being offered during the booking process, and that option can help you avoid the “I brought the wrong shoes” problem.
Guides: what really stands out about the storytelling and safety
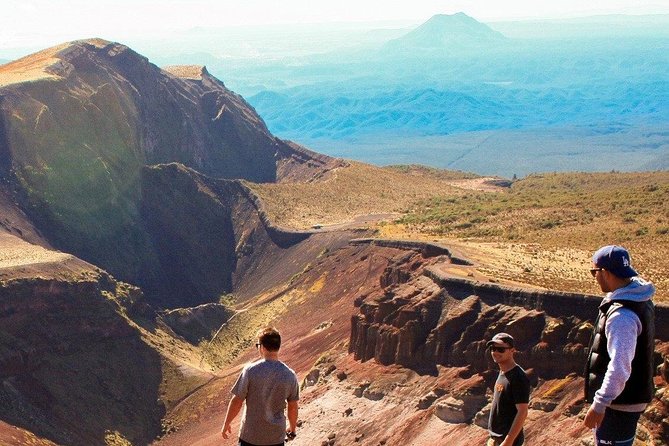
This tour includes a professional Kiwi guide, and it shows in how the hike feels on the ground. Multiple people highlight guides who are funny, friendly, and attentive to each person’s pace. You’ll also see praise for guides who handle the group well even when the terrain gets spicy.
You’ll likely hear Māori history and cultural connection tied to the mountain. People mention this as a major reason the day feels meaningful, not just scenic. It’s also part of why the geology isn’t dry. The stories help explain the eruption’s impact on people and land.
Names that appear in experience reports include Jesse and Hauri, Jonathan, Chucky and Deborah, Dan, Jack, Frank, and AJ (often in pairs). That suggests a consistent team approach: two guides is a common format, and it helps with safety on rough terrain.
One more small but important thing: guides appear to watch wind conditions. Some people mention the guides avoiding areas with severe gusts. That kind of judgment is hard to fake, and it makes a big difference when you’re trying to keep footing on uneven ground.
Value check: is $121.01 worth it?
At $121.01 per person for about 4.5 hours, you’re paying for more than a ticket to walk up a hill. You’re buying three key ingredients:
1) Guide-led navigation and safety on steep volcanic terrain
2) Pickup and drop-off that keeps your day simpler in Rotorua
3) Interpretation—eruption context, Waimangu Valley explanation, and Māori connections
The hike also has a ceiling of 20 people, which usually helps with pace control and the chance to get questions answered.
What’s missing is lunch. That means you should plan to eat before or after and budget for it. If you’re the kind of person who gets hangry on steep hikes, pack a snack or plan a nearby meal after the tour.
Balanced take: yes, the price can feel steep if you show up underprepared (wrong footwear, not enough fitness, no layers). But if you come ready, you’re paying for a structured, guided, genuinely scenic crater experience—not just transportation to a trailhead.
Weather and visibility: how to think about cancellations and wasted views
The experience requires good weather. If conditions are poor, you’ll be offered a different date or a full refund.
Here’s how I’d make the decision day-of: don’t chase perfect photos at the expense of safety. If the day is windy or visibility is low, ask your guide how they’re adapting the plan. The crater area is exposed, and wind affects both comfort and footing.
Since the hike is outdoors and scenic viewpoints are part of the point, clear conditions do matter. Still, even with less-than-perfect visibility, a guided crater walk remains educational because you’ll be learning what the eruption made and why the terrain looks the way it does.
The one negative to watch for: transport and shoe mismatch
One experience report described the ride and vehicle condition as a disappointment and mentioned delayed arrival. The provider response then said vehicles have been upgraded and that boot hire was available during booking.
That means you should treat comfort planning as part of your prep:
- If pickup timing is important to you, be flexible about how early you need to be ready.
- If you’re unsure about footwear, don’t improvise—get boots or use the boot hire option if it’s offered.
- If you’re prone to slipping, take extra care on scree and talus sections and follow the guide’s line.
Most reports are glowing, but this is the kind of tour where one mismatch in expectations can cause real frustration. Preparing well is how you avoid the “I couldn’t finish” scenario.
Should you book Mt Tarawera Crater with Kaitiaki Adventures?
Book it if you want a guided volcanic hike from Rotorua that mixes real geology, Māori storytelling, and dramatic crater-edge views. It’s especially a good fit if you like structured days with a small group and you’re happy to work a bit physically for big scenery.
Skip it or choose a gentler option if:
- you’re not comfortable with steep, uneven descents,
- you’re nervous around heights,
- you hate cold wind exposure,
- or you don’t have solid hiking footwear.
One final practical tip: you can be moderately fit and still need the right gear. Higher socks, good shoes, layers, and plenty of water turn this from “hard hike” into “earned adventure.”
If that sounds like your style, this is one of the most memorable crater experiences you can fit into a Rotorua trip.
FAQ
How long is the Mt Tarawera guided crater hike?
It runs for about 4 hours 30 minutes.
Do you include hotel pickup and drop-off in Rotorua?
Yes. Free hotel/motel pickup is included.
Can I choose a morning or afternoon tour?
Yes, you can choose a morning or afternoon option.
What’s included in the price?
The tour includes the 4.5-hour Mt Tarawera crater experience, a professional Kiwi guide, and free pickup. Lunch is not included.
How big are the groups?
The experience has a maximum of 20 travelers.
How fit do I need to be?
You should have moderate physical fitness level.
Is there an optional scree run?
Yes, there is an optional scree run into the heart of the volcanic crater.
Where do the stops happen during the tour?
Stops include Kaitiaki Adventures, Waimangu Volcanic Valley, Rerewhakaaitu Bretts Road Camping Area, and Mt Tarawera.
What footwear should I wear?
Wear good hiking shoes. One repeated tip is higher socks to help stop scoria from cutting skin around the ankles, and boot hire may be available during booking.
What if the weather is bad?
The tour requires good weather. If it’s canceled due to poor weather, you’ll be offered a different date or a full refund.