REVIEW · ICELAND
Vatnajokull: Skaftafell Glacier Hike
Book on GetYourGuide →Operated by Guide to Iceland · Bookable on GetYourGuide
A glacier hike feels like stepping into another world, and Skaftafell delivers that in a very hands-on way. I especially love the sparkling blue ice and crevasses you get close to, and I like that the certified guides help you move safely. The main consideration is that this is true ice walking—so it’s not a good fit if you have heart problems, or if you need mobility support.
You’ll meet at Fosshotel Glacier Lagoon, gear up, then head into Vatnajökull National Park for a 3-hour guided walk that’s built for both beginners and experienced hikers. If you pack warm layers and proper shoes, you’ll get a memorable look at why Vatnajökull matters—and how it’s changing.
In This Review
- Key points to know before you go
- Skaftafell Glacier Hike: what makes this 3 hours matter
- Where you start: Fosshotel Glacier Lagoon and what it sets up
- The guide and the safety lesson: the difference between scary and doable
- Gear check: crampons, helmets, and ice axes (and what to bring)
- Walking onto Vatnajökull: blue ice, crevasses, ridges, and moulins
- What panoramic views add (and when they don’t)
- The 3-hour rhythm: how the timing feels on the ground
- Price and value: is $97 worth a guided glacier hike?
- Who should do the Skaftafell Glacier Hike (and who should skip it)
- Weather and clothing: the small choices that decide comfort
- Food, drinks, and timing: plan your day around the missing essentials
- If you want the most out of it: simple on-ice habits
- Should you book the Skaftafell Glacier Hike?
- FAQ
- How long is the Skaftafell Glacier Hike?
- Where do I meet the guide?
- What’s included in the price?
- What should I bring for the hike?
- Is food and drinks included?
- What language will the guide speak?
- What health or mobility limits mean I shouldn’t book?
Key points to know before you go
- Short, guided 3-hour format that still feels like real glacier time
- Crampons, helmets, and ice axes provided so you’re not guessing
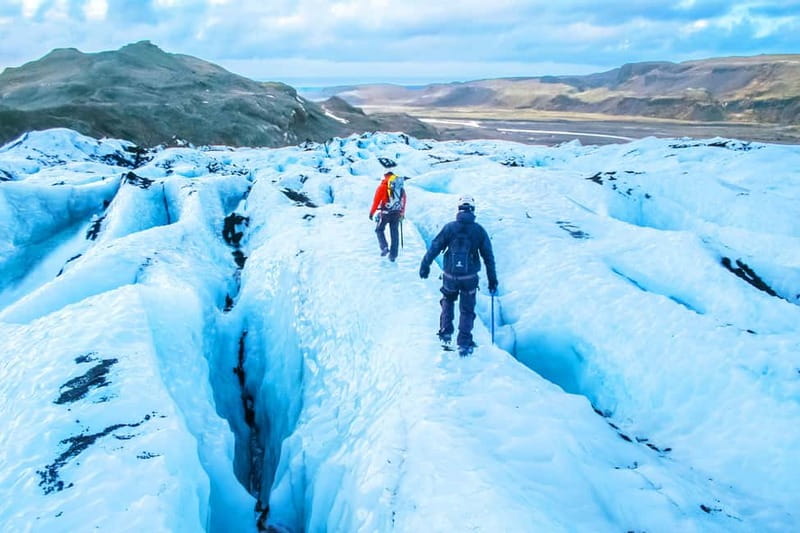
- Up-close blue ice, crevasses, ridges, and moulins with guide explanations
- Panoramic mountain and icefield views that make the effort worth it
- Safety-first instruction before you step onto the glacier
- Guides with strong track records, including David and a guide nicknamed Stone
Skaftafell Glacier Hike: what makes this 3 hours matter
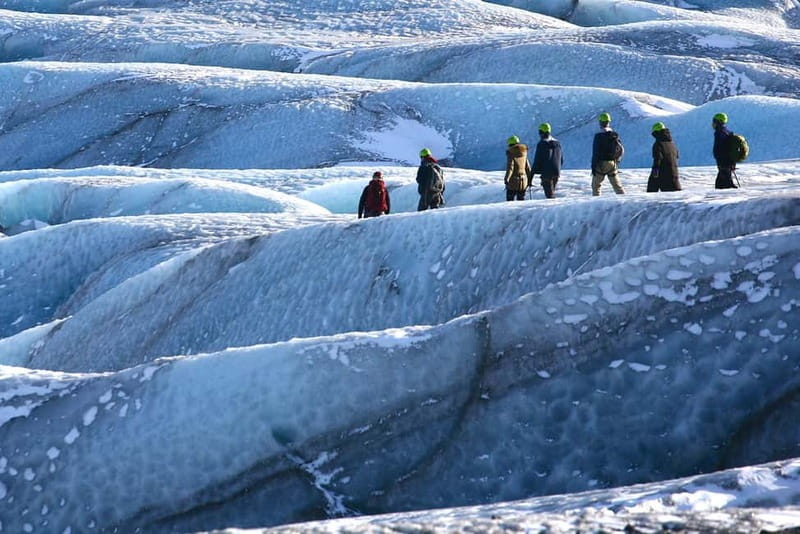
Vatnajökull is the big glacier name in Iceland, and this hike is one of the easiest ways to experience it up close. You’re not just looking from a distance. You’re walking on the ice while your guide points out how it’s shaped, how it moves, and what climate change is doing to glaciers like this one.
I like that the pace stays realistic for a wide range of hikers. You get a short scenic walk first, then you’re on the ice exploring glacier features. That structure helps you go from first-time jitters to confident steps.
And yes, it’s cold and slippery by design. That’s why the provided gear and pre-hike training matter so much. When you get it right—layers on, shoes set, crampons fitted—you’re free to focus on the views and the glacier itself.
You can also read our reviews of more hiking tours in Iceland
Where you start: Fosshotel Glacier Lagoon and what it sets up
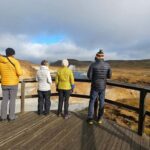
Your meeting point is outside Fosshotel Glacier Lagoon, which is a handy start because it’s easy to find and it keeps the morning simple. Plan to arrive about 15 minutes early for check-in so you’re not rushing gear, instructions, and fitting your crampons.
This start point also shapes the feel of the experience. You’re already in Vatnajökull country, with the glacier presence close in your field of view. It makes the transition from “I’m here to see ice” to “I’m walking on ice” feel fast and natural.
If you’re traveling without a rental car, remember transportation to Skaftafell is not included. You’ll want to build that into your day so the hike time is the only time stress you deal with.
The guide and the safety lesson: the difference between scary and doable
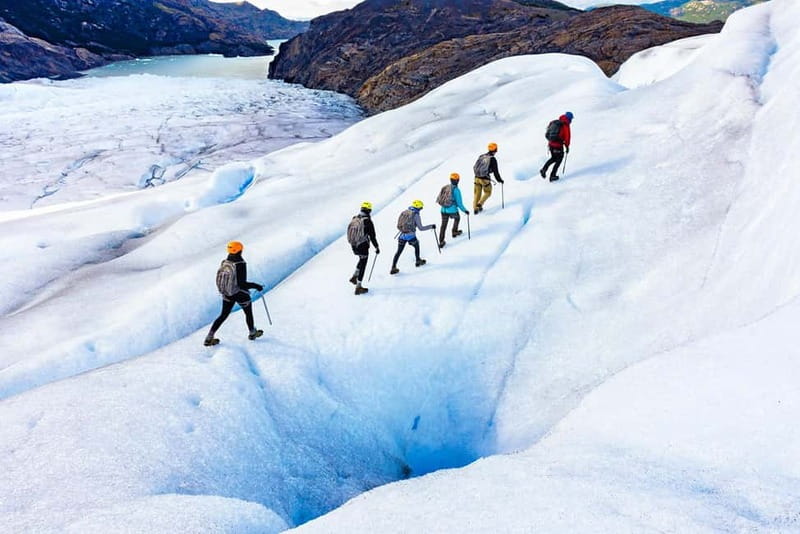
The experience runs with a certified glacier guide who handles the essential part: getting you equipped correctly. You’ll be welcomed, given the safety gear (crampons, helmet, ice axe), then briefed on how to use what you’re wearing and holding.
This is where I think the value really shows. Glacier hiking isn’t about bravado. It’s about small, correct movements on a surface that can be deceptive. A good guide watches your footing and keeps things controlled, and you feel that during the hike rather than just at the start.
Based on guide names shared in the reviews, you might meet someone going by David, or a guide nicknamed Stone (also mentioned as The Rock). Either way, the theme is consistent: watch carefully, help with technique, and make the task feel less daunting once you’re moving.
Gear check: crampons, helmets, and ice axes (and what to bring)
You’ll receive the safety equipment as part of the tour, including crampons, helmets, and ice axes. That’s a big cost and hassle saver because buying or renting the right glacier gear yourself can get complicated fast.
What you bring is just as important. Pack warm clothing and dress in layers so you can adjust as you warm up. Bring hiking shoes you’re comfortable standing and walking in for a couple hours on uneven terrain. And bring water—even on a guided hike, you still need basics.
A camera makes sense here. The ice features are the star, and you’ll want to capture them before they change under new light. I also recommend you bring a pair of gloves you’re comfortable using outdoors, even though gloves aren’t explicitly listed—if you tend to get cold fast, it’s a smart move.
Walking onto Vatnajökull: blue ice, crevasses, ridges, and moulins
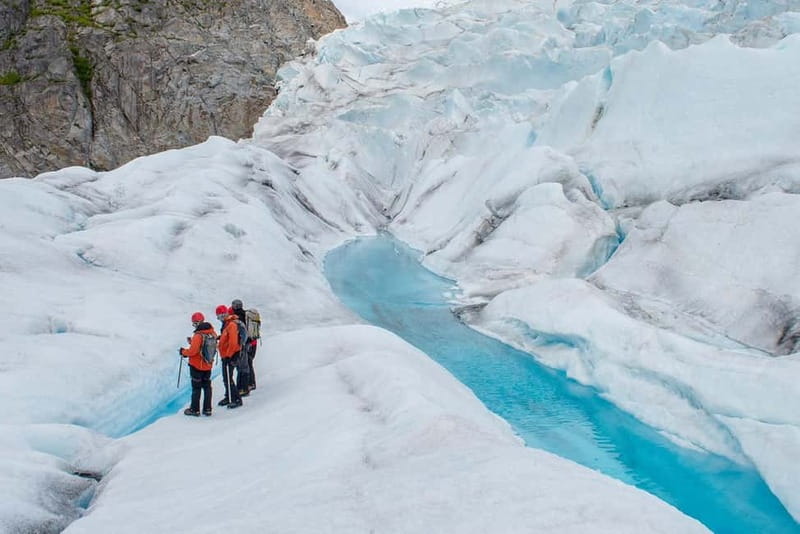
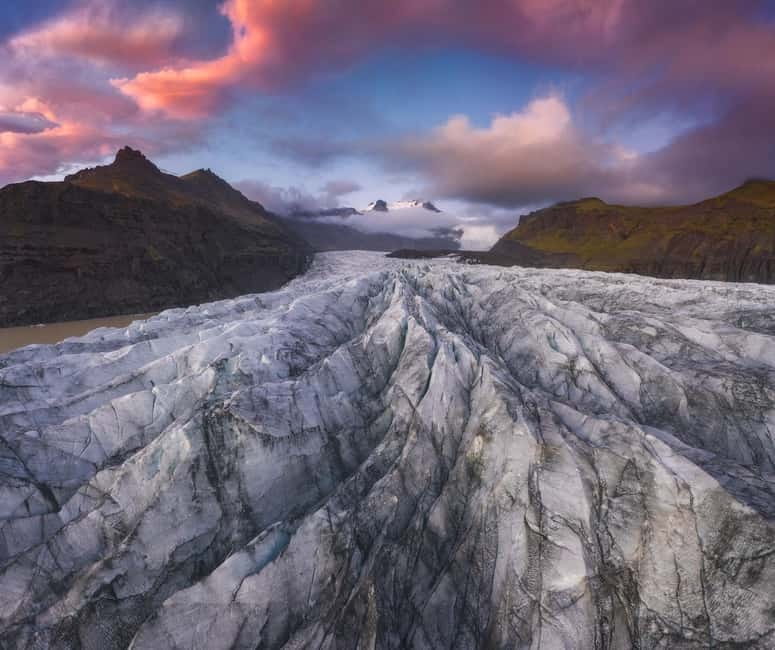
Once you reach the glacier edge, you’ll step from land into the icy world of Vatnajökull. This is the moment most people came for: the sparkling blue ice, the jagged lines of crevasses, and the feeling that the glacier is both ancient and alive.
Your guide will talk you through what you’re seeing. You’ll learn about glacier formation and movement—plus the effects of climate change on ice like this. Even if you’ve read glacier facts before, hearing it while you’re standing on the real thing sticks better.
You’ll also encounter dramatic ice features like moulins and towering ridges. The crevasses aren’t just pretty cracks. They’re part of how the ice is reshaped as it flows and stresses over time. That’s why the guide explanations are more than trivia; they help you interpret the terrain as you move across it.
What panoramic views add (and when they don’t)
One of the best parts of glacier hikes is the switch from close-up detail to wide-open sightlines. You’ll get panoramic views of the surrounding mountains and icefields, and that wider frame helps you understand scale.
That said, weather can change the experience fast in Iceland. You might lose some visibility if clouds roll in, but you’ll still see ice textures up close. The key is to stay warm and keep moving steadily, because your focus can shift from scenery to glacier features depending on conditions.
Either way, the combination works well for people who want both “wow up close” and “wow from far away.”
The 3-hour rhythm: how the timing feels on the ground
This hike is designed to fit into a shorter Iceland day without skipping the real glacier part. The total duration is 3 hours, including the time to get briefed, walk to the glacier edge, and explore on ice.
Here’s the rhythm you should expect:
- A welcome and gear fitting at the start
- A safety introduction and quick technique lesson
- A short scenic walk to the glacier
- Time walking on ice to see blue ice, crevasses, ridges, and moulins
- Returning to the meeting area at Fosshotel Glacier Lagoon
The “short scenic walk” matters because it transitions you from hiking mode to ice mode. It also buys you time to get comfortable before you’re fully on crampons.
Price and value: is $97 worth a guided glacier hike?
At $97 per person, this is the kind of price that can feel high until you price out what’s included and what it replaces. You’re paying for certified glacier guidance, safety instruction, and glacier-specific gear—crampons, a helmet, and an ice axe.
Without that support, a glacier hike can be an expensive DIY mistake. With it, you get a structured experience that prioritizes safe movement on ice. You’re also paying for expertise that’s used in real time, as the guide points out features and explains formation and glacier change.
So for me, the value comes from two things: you’re on the glacier for a meaningful chunk of time, and you’re doing it with equipment and coaching built for this environment. If you want glacier access with minimal guesswork, this is a strong way to spend money in Iceland.
Who should do the Skaftafell Glacier Hike (and who should skip it)
This hike is ideal if you want a real glacier experience but don’t want a long expedition. It’s described as great for both beginners and experienced hikers, which makes sense because the guide provides equipment and instruction.
You’ll likely enjoy it most if you:
- like hands-on outdoor experiences
- want guided explanations of glaciers and climate change
- are comfortable walking on uneven, icy ground with support
On the flip side, it’s not suitable for:
- pregnant women
- people with mobility impairments
- people with heart problems
If any of those apply, don’t try to “tough it out.” This is a safety-focused activity, and the conditions are real.
Weather and clothing: the small choices that decide comfort
Iceland weather can feel like a prank. One minute you’re fine, next minute you’re chilly again. The best approach is layers, because the hike includes both waiting times for fitting and active walking on ice.
Bring warm clothing and wear it so you can move. Your goal isn’t to look like a mountaineer—it’s to stay warm without overheating. If you run hot, you’ll want layers you can shed quickly.
Also, make sure your hiking shoes are suitable for the terrain. You’ll be walking with crampons involved, so choose footwear you trust.
Food, drinks, and timing: plan your day around the missing essentials
Food and drinks are not included, so plan to eat before or after the hike. Since it’s a 3-hour tour, you’ll be out long enough that skipping water is a bad idea, but you won’t have time to stop for snacks the way you might on a long walk.
If you’re building your day around this, give yourself time to get warm and fed afterward. Glacier hikes are physical and cold. A warm meal later can turn the experience from “I survived ice” into “I’m already planning a return.”
If you want the most out of it: simple on-ice habits
Glacier walking rewards calm, steady movement. When your guide gives technique cues, take them seriously even if you feel confident. That confidence is great, but it has to be the right kind—small steps, stable footing, and focus on where you’re placing your feet.
Also, keep your camera accessible but not in the way. You’ll want to shoot the crevasses and ridges, but don’t fumble with gear while you’re on ice. Save some photos for moments when the group pauses.
Finally, listen for the guide explanations. The glacier doesn’t just look cool. It has structure—blue layers, cracks, flow patterns—and the guide helps you read it as you go.
Should you book the Skaftafell Glacier Hike?
I’d book this tour if you want a true glacier experience without turning it into a full-day production. For the price, you get certified guidance, safety gear, and a guided look at blue ice, crevasses, ridges, moulins, and wide views in just 3 hours.
Skip it if you can’t handle icy, physically demanding conditions, or if your health situation makes this type of activity unsafe. And if you don’t have transport to Skaftafell area (or the meeting point area setup), plan that ahead because transportation isn’t included.
If you’re willing to dress for cold and follow the instructions, this is one of the more straightforward ways to understand why Vatnajökull matters—and why it’s changing.
FAQ
How long is the Skaftafell Glacier Hike?
The tour duration is 3 hours.
Where do I meet the guide?
The guide meets you outside Fosshotel Glacier Lagoon.
What’s included in the price?
The tour includes a certified glacier guide, a brief safety introduction, and safety equipment such as crampons, helmets, and ice axes, plus fees and taxes.
What should I bring for the hike?
Bring warm clothing, a camera, hiking shoes, and water.
Is food and drinks included?
No. Food and drinks are not included.
What language will the guide speak?
The live tour guide speaks English.
What health or mobility limits mean I shouldn’t book?
The tour is not suitable for pregnant women, people with mobility impairments, or people with heart problems. Smoking is also not allowed during the activity.