REVIEW · AORAKI MOUNT COOK NATIONAL PARK TE WAHIPOUNAMU
The Adventurer: Tasman Glacier Heli-hike
Book on Viator →Operated by Mt Cook Glacier Guiding · Bookable on Viator
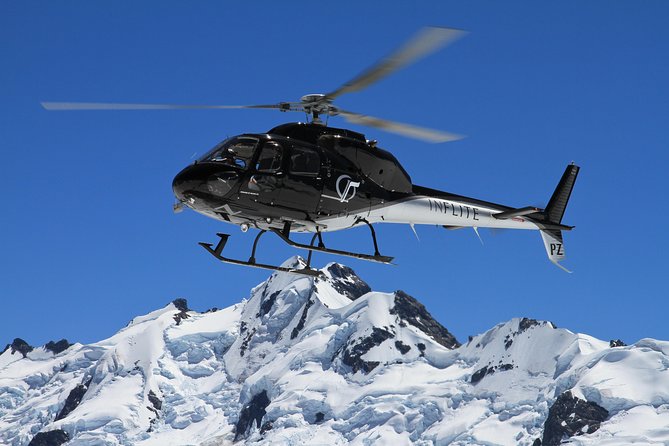
A helicopter drops you onto a glacier. That alone makes the Tasman Glacier heli-hike different from any other glacier walk. I love the mix of two scenic flights (including a Mount Cook/Aoraki fly-by) and a real guided walk on icy terrain you can’t reach by road.
What also makes this feel premium is the way they set you up for the cold. You get proper cold-weather gear like leather boots with wool socks plus crampons (or snow shoes in winter) so you can focus on the ice, the steps your guide cuts, and the formations—not your footwear failing you.
One consideration: the whole experience depends on weather and strict helicopter timing, so you may need to wait until close to departure (or switch dates) for safety.
In This Review
- Key points
- Helicopter access to Tasman Glacier starts at Mount Cook Airport
- The two helicopter flights and the Mt Cook/Aoraki fly-by
- Stop 1: glacier guiding on the Tasman at about 1,300 metres
- What the guide actually does: safety, pace, and photo moments
- Gear that keeps you warm: boots, layers, and traction
- Timing, weather, and the reality of helicopter schedules
- Who should book the Tasman Glacier heli-hike
- Price and value: what $572.23 buys you
- Tips to get better views and a smoother day
- Should you book the Tasman Glacier Heli-hike?
- FAQ
- How long is the Tasman Glacier Heli-hike?
- Where does the tour start and end?
- What’s included in the price?
- What should I wear and bring?
- Do I need a certain fitness level?
- What happens if the weather isn’t safe?
- How big is the group?
Key points
- Two helicopter rides: you get glacier access plus big Mt Cook/Aoraki views from the air
- Small group size (max 11): easier to get help and more time for photos
- Real glacier footwear and traction: leather boots, wool socks, crampons/snow shoes
- Guided safety on steep ice: your guide cuts steps and leads the pace
- About 3 hours total: a half-day “wow” that doesn’t eat your entire travel day
Helicopter access to Tasman Glacier starts at Mount Cook Airport
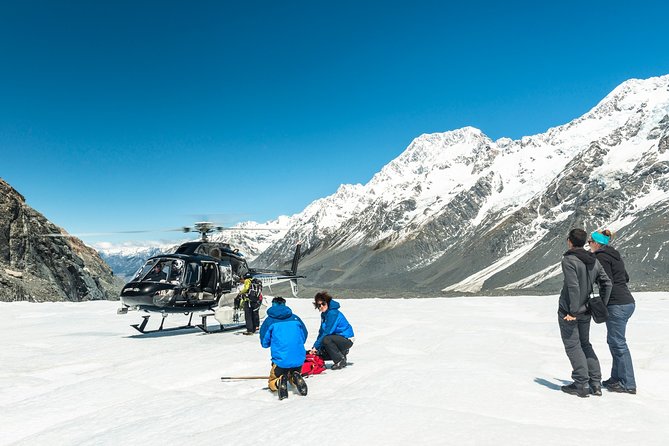
This tour runs out of the Mount Cook area, starting at Mount Cook Airport and ending back there. You’re not driving to the glacier edge and hiking from there. Instead, you’re flown to a landing point high on the Tasman Glacier, which changes the whole feel of the day.
From your perspective, that means two things. First, you spend less time slogging across access routes and more time on the ice formations. Second, the views during the flights are part of the experience, not just transportation. Your day is designed around air-time, ice-time, and a return flight that’s meant to cap it off.
Also, the group size matters. With a maximum of 11 travelers, the guides can move at a careful pace and keep an eye on everyone’s footing and comfort.
The two helicopter flights and the Mt Cook/Aoraki fly-by
The headline here is the helicopter, and you should treat the flights like a built-in sightseeing program.
You get round-trip helicopter flight time with scenic views, including a fly-by of Mount Cook (Aoraki). In plain terms: you’re going to see why this region is famous. Even if you’ve seen photos before, the scale hits differently when you’re above it, not beside it.
One detail that can really make the difference is how you’re seated. In at least some departures, they adjust seating so most people get a strong view out the windows either on the way in or the way back. If you care about photography, that’s worth paying attention to when the crew calls everyone up.
Value-wise, the helicopter cost is the main reason this isn’t a cheap outing. But the trade-off is speed and access. You’re buying a shortcut that still feels like a full experience: views, landing, then hiking.
Stop 1: glacier guiding on the Tasman at about 1,300 metres
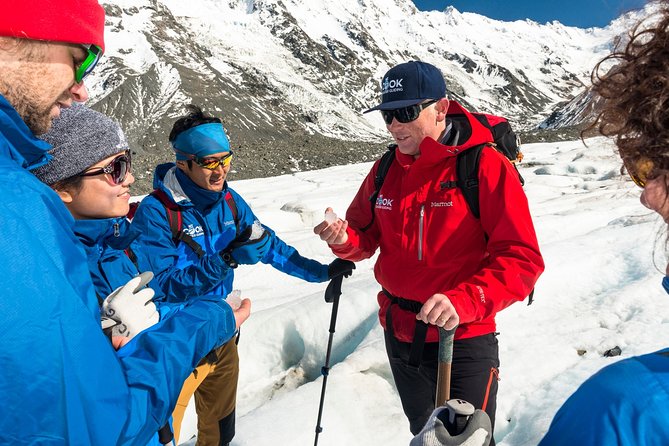
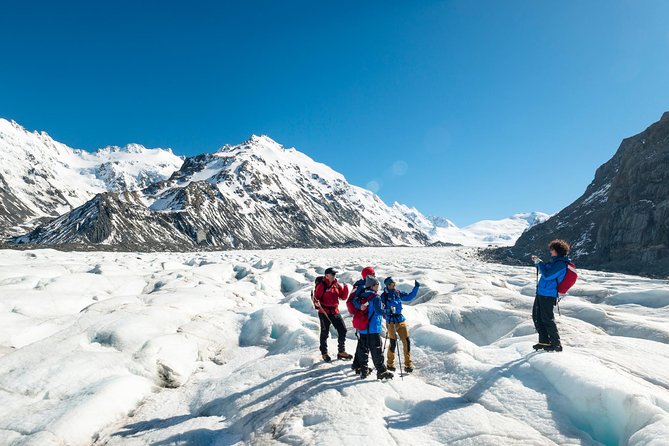
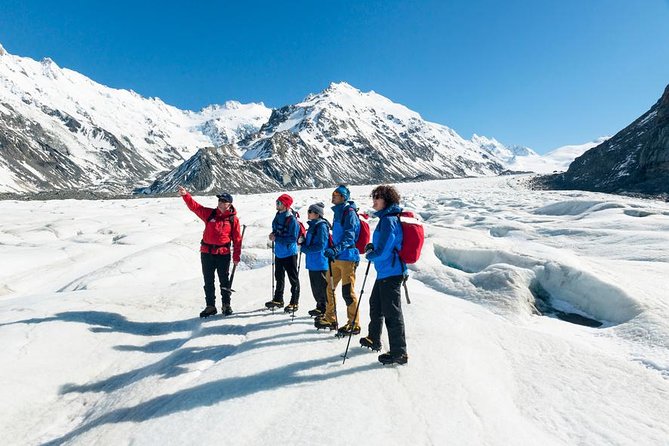
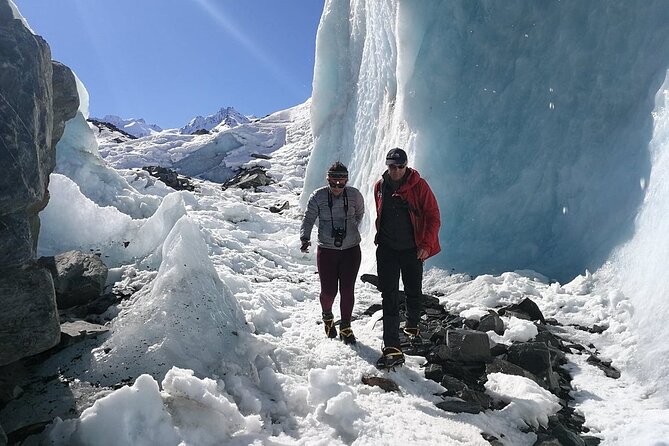
Once you land, the “heli-hike” part gets real. You’ll be fitted with crampons (and/or snow shoes in winter), then follow your guide across the glacier’s icy formations.
The guide doesn’t just point. You walk as they move. And they cut steps in the ice when needed—using skills passed down from early NZ mountain pioneers. That matters because glacier terrain changes fast. Snow texture, ice hardness, and hidden slick spots can vary even within the same area. Having a guide who can set a safe route makes the walk feel adventurous without feeling random.
You’re hiking roughly at 4,265 ft (1,300 m) altitude. That’s not extreme high altitude like you’d see in the Himalaya, but it can still feel colder and crisp at the top. Expect a short, focused hike rather than a long-distance trek.
This is also where you might see extra surprises depending on conditions. Some outings include things like ice caves, an ice tunnel, or dramatic blue-white ice features. In one story, someone even ended up watching water surge underneath an ice pocket. Don’t assume those exact spots each time, but do expect that your guide will try to show you interesting ice geometry and give you photo breaks when the conditions allow.
What the guide actually does: safety, pace, and photo moments
A good glacier guide is part instructor, part safety officer, and part “make it memorable” person.
In real-world terms, here’s what that looks like:
- You’ll get clear instructions on how to move with traction on
- Your guide controls pacing so the group stays together
- Steps get cut when the glacier surface demands it
- You’re given time to stop for photos
I particularly like the small-group feel here. With a max of 11 people, your guide can help faster if anyone needs a glove adjustment, footing check, or a quick confidence boost. Reviews also highlight guides by name—people like Flav, Hunter, Fiona, Pawel, and Richard—which is a sign this isn’t just a ticket product. The people leading you are part of the quality.
If you’re hoping for a lot of standing around, this probably isn’t for you. You should expect purposeful movement, with pauses that make sense for safety and sightlines.
Gear that keeps you warm: boots, layers, and traction
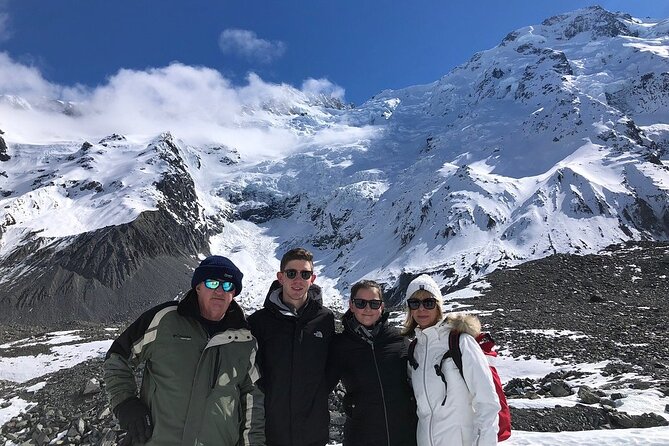
You don’t have to show up in full winter survival gear, because the tour supplies a lot. Included items cover the big “don’t get wet” and “don’t slip” problems:
- Quality leather boots and woolen socks
- Waterproof jacket and over-trousers
- Adjustable walking poles
- Harness (if required)
- Crampons (and/or snow shoes in winter)
That kit takes away the biggest risk for first-timers: arriving with the wrong footwear or not enough warmth. Leather boots plus wool socks are a smart combo for cold conditions because the socks help manage moisture while you’re standing on ice and after you get moving.
What you still need to bring is mostly about layering and sun/comfort:
- 3–4 layers of warm upper body clothing
- Warm trousers (no jeans)
- Sunglasses and sun protection
- A hat and gloves
- Drink and snacks
- A camera, because you’ll want one
Quick practical note: jeans can get cold fast and they don’t move the way warm hiking layers do. If you only have one pair of “winter pants,” use those instead.
Timing, weather, and the reality of helicopter schedules
Glacier days are weather days. This tour is dependent on favourable weather conditions, and if it’s unsafe, you’ll be offered either an alternative date or a full refund.
What I like is how the experience handles the uncertainty. People have described waiting until close to departure to confirm it’s safe, then getting timely updates. That approach makes sense: helicopter flight windows are real, but safety has to win.
One more thing: helicopter scheduling is strict. If you miss your confirmed departure time and the space can’t be resold, you can be charged the full cost. This is the kind of tour where arriving early isn’t optional. Get there with time to breathe.
If you’re traveling with limited flexibility, this might stress you out—because even if the plan is fixed, the weather isn’t. If you can build a little slack into your itinerary, the experience is much less stressful.
Who should book the Tasman Glacier heli-hike
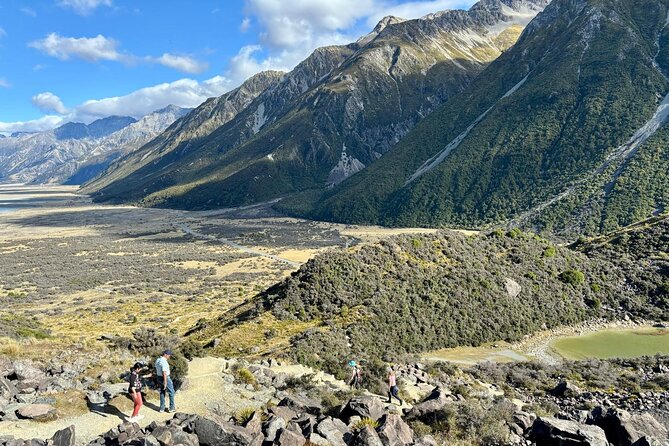
This is listed for travelers with moderate physical fitness. In plain language, it should work for many active people who can walk steadily on uneven surfaces, stand while getting fitted with gear, and handle cold temperatures.
You’ll enjoy it most if:
- you want a glacier experience that’s more than a quick viewpoint stop
- you like guided days with safety instruction and photo breaks
- you want big scenery without dedicating your entire day to driving and hiking
You might skip it if:
- you’re uncomfortable with traction devices (crampons) or slipping risk
- you hate cold weather, even with proper outerwear
- your schedule is so tight that weather delays would ruin your trip
Because it’s a max of 11 people, it also suits groups who want attention from the guide and a more personal pace. Solo travelers often like that setup too, since you’ll be with a small group rather than packed into a large tour bus.
Price and value: what $572.23 buys you
At $572.23 per person, this is a premium outing. The price isn’t just for a hike. You’re paying for:
- Two helicopter flights
- professional guidance on technical ice terrain
- full glacier gear for warmth and traction (boots, socks, waterproof layers, crampons/snow shoes, poles)
- a glacier-access landing point that would require a major overland effort otherwise
That’s the core value math. If you compare this to DIY access, the helicopter is what makes it practical. And because the total time is about 3 hours, it fits well into a travel day without costing half your vacation to logistics.
Is it expensive? Yes. But if you’re in the Mount Cook area and you want one “seriously New Zealand” adventure, this is a strong candidate because it combines aircraft views with hands-on glacier walking.
Tips to get better views and a smoother day
You can’t control the weather, but you can control how prepared you show up. Here’s what will help the most:
- Wear your warm layers and skip jeans for trousers
- Bring glasses, gloves, and a hat—cold wind on open ice is real
- Pack a camera and keep it accessible for photo stops
- Drink and snack ahead of time. You’ll want energy for the walk.
- Arrive early so you’re not rushing through check-in during a helicopter day
If you get a choice of seating during boarding, take it. Even small seating differences can mean better views in the air.
Should you book the Tasman Glacier Heli-hike?
If you’re planning a South Island itinerary and want one glacier experience that feels special fast, I’d book it—especially if you can stay flexible for weather. The combination of helicopter access, guided traction hiking, and Mount Cook/Aoraki views is exactly the kind of value that’s hard to replicate with normal hiking.
I’d only hesitate if your schedule is rigid or you’re not comfortable in cold, icy conditions even with provided gear. If that’s you, consider a more weather-robust option.
On the other hand, if you’re the type who thinks a glacier is worth the effort and you want a guide-led day with time to take photos, this is one of those outings that’s built to feel like a once-in-a-lifetime NZ moment.
FAQ
How long is the Tasman Glacier Heli-hike?
It runs for about 3 hours.
Where does the tour start and end?
It starts at Mount Cook Airport (Mount Cook Road, Canterbury Region 7999, New Zealand) and ends back at the meeting point.
What’s included in the price?
You get two scenic helicopter flights, a professional guide, quality leather boots and woolen socks, and waterproof jacket and over-trousers. You’ll also get crampons (or snow shoes in winter), harness if required, and adjustable walking poles.
What should I wear and bring?
Bring 3–4 layers of warm upper-body clothing, warm trousers (no jeans), sunglasses and sun protection, a hat and gloves, plus drink and snacks.
Do I need a certain fitness level?
The tour calls for moderate physical fitness.
What happens if the weather isn’t safe?
If canceled due to poor weather, you’ll be offered an alternative date or a full refund.
How big is the group?
The tour has a maximum of 11 travelers.